

@@GetMapping을 사용한 페이지를 가져오기
1. 단순 페이지 불러오기
// localhost:8080/SimpleMapping1 으로 페이지 불러오기
    @GetMapping("SimpleMapping1")
    public String SimpleMapping1(){
        // views/SimpleMapping/SimpleMapping1.jsp 페이지
        return "SimpleMapping/SimpleMapping1";
    }
2. 페이지 숫자만 받기 / 영어문자로만 받기
// localhost:8080/SimpleMapping1 으로 페이지 불러오기
@GetMapping("/SimpleMapping2/{number:[1-9]+}")
public String SimpleMapping2Number(@PathVariable String number){
System.out.println("number = > " + number);
// views/SimpleMapping/SimpleMapping1.jsp 페이지
return "SimpleMapping/SimpleMapping1";
}
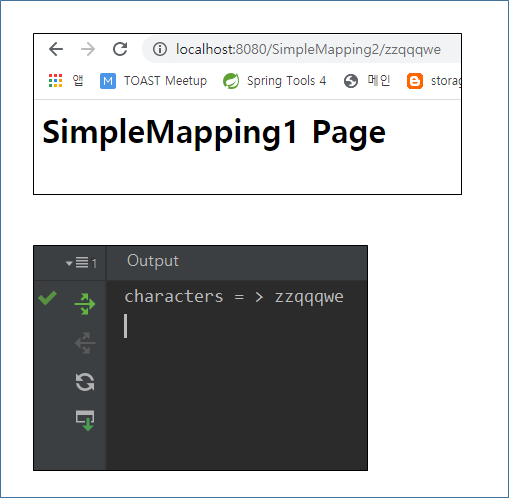
// localhost:8080/SimpleMapping1 으로 페이지 불러오기
@GetMapping("/SimpleMapping2/{characters:[a-z]+}")
public String SimpleMapping2String(@PathVariable String characters){
System.out.println("characters = > " + characters);
// views/SimpleMapping/SimpleMapping1.jsp 페이지
return "SimpleMapping/SimpleMapping1";
}2-1. 숫자로만 매핑 결과

2-2. 영어로만 매핑 결과
3. 페이지 요청 모든 패스 받기 / 한 패스만 받기
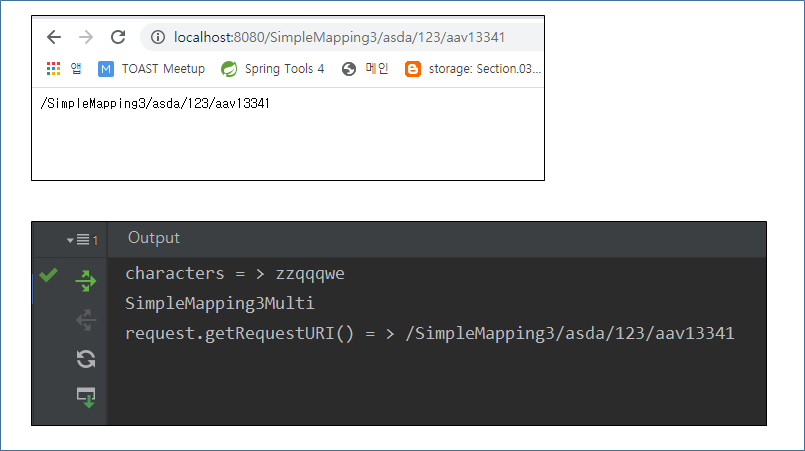
    // "SimpleMapping3/"만 맞는 다면, 모든 다 받는다(ex: "test/123" , "test" , "test/1111/1123123")
    @GetMapping("/SimpleMapping3/**")
    @ResponseBody
    public String SimpleMapping3Multi(HttpServletRequest request){
        System.out.println("SimpleMapping3Multi");
        System.out.println("request.getRequestURI() = > " + request.getRequestURI());
        return "SimpleMapping3Multi " + request.getRequestURI();
    }

    // "SimpleMapping3/" 아래의 한 패스만 받는다, (ex: "test" , "zzzzz" , "1123123")
    @GetMapping("/SimpleMapping3/*")
    @ResponseBody
    public String SimpleMapping3Simple(HttpServletRequest request){
        System.out.println("SimpleMapping3Simple");
        System.out.println("request.getRequestURI() = > " + request.getRequestURI());
        return "SimpleMapping3Simple " + request.getRequestURI();
    }
3 - 1. 모든 패스 받기
3 - 2. 한 패스 받기

'[Spring]' 카테고리의 다른 글
| [SpringMVC] 스프링 JSP에서 HTML로 설정 변경하기 (0) | 2020.07.31 |
|---|---|
| [SpringMVC] @GetMapping MockMVC 테스트해보기 (0) | 2020.04.02 |
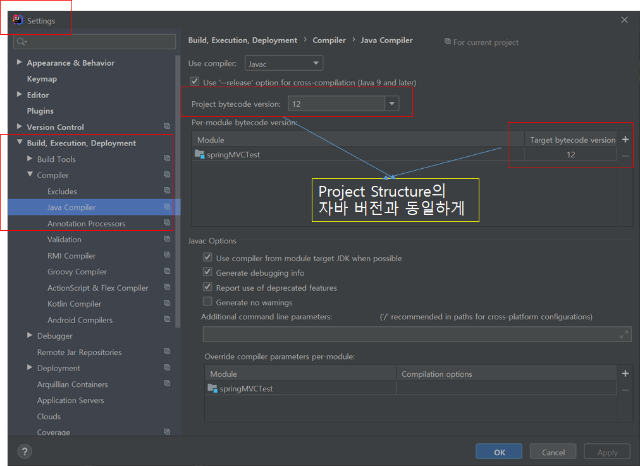
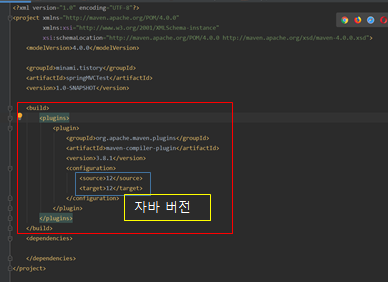
| [Spring 에러] intellij release version 5/11/12 not supported (0) | 2020.03.31 |
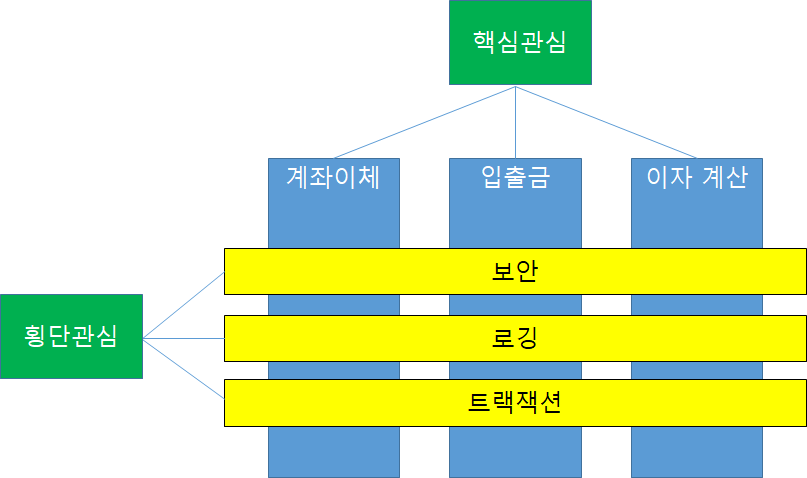
| [Spring] @AOP(Aspect Orient Programming)의 이해 (0) | 2020.03.23 |
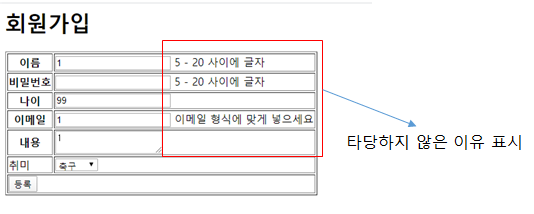
| [Spring]Spring Validation 사용해보기 (0) | 2020.03.17 |

미나미나미