# vworld 3d 이동하기 


- vw.CoordZ(X,Y,Z) 클래스 : X(경도), Y(위도), Z(지면으로부터의 높이)

- vw.Direction(heading,tilt,roll) 클래스 : heading(수평방향 회전각도), tilt(수직방향 회전각도),roll(카메라자체 회전각도)

- map3d.moveTo('카메라위치');

  주어진 좌표로 이동한다.


 # 소스 코드 설명

1. 지도 이동 버튼

지도이동버튼


2.  지도 이동 실행 코드 

지도 이동 실행 코드 


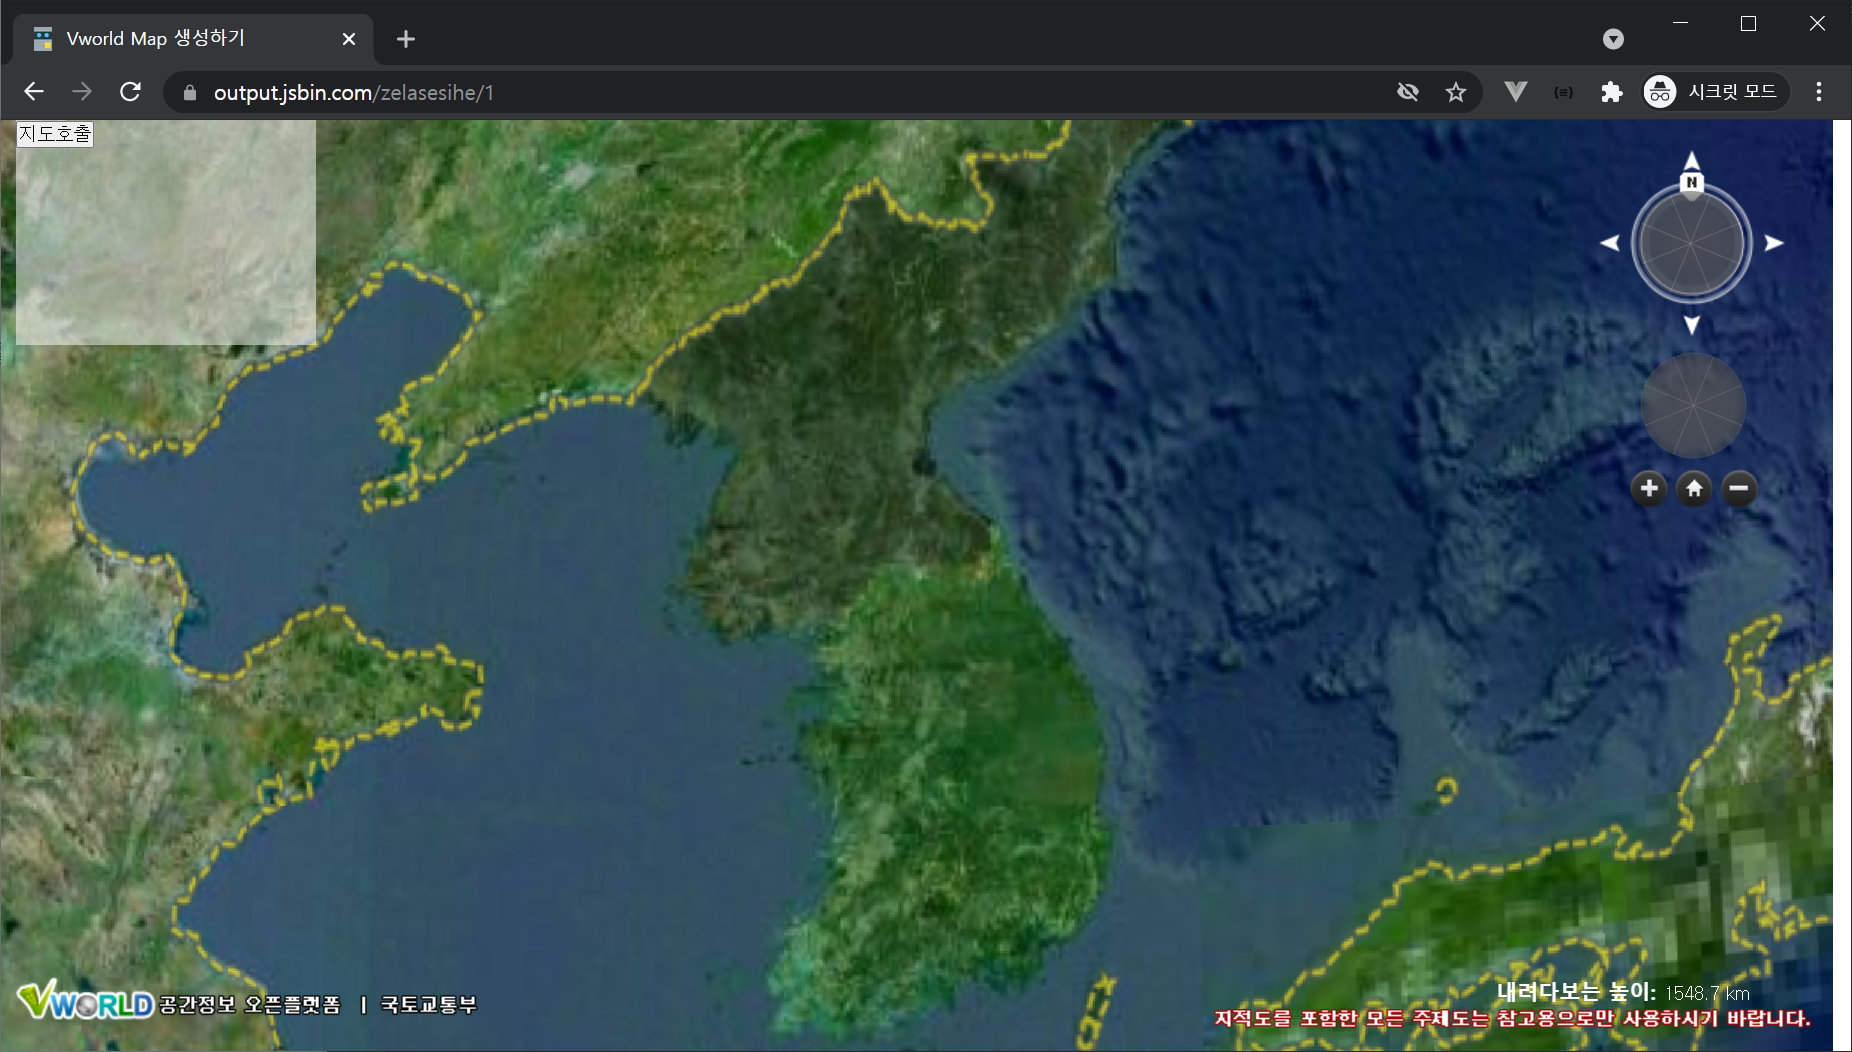
- 결과화면  : https://output.jsbin.com/luziriyuva


Vworld Map 생성하기


output.jsbin.com

테스트 결과화면


# 전체 소스코드 부분

더보기

<!DOCTYPE html>

<html>


<head>

    <meta http-equiv="Content-Type" content="text/html; charset=UTF-8" />

    <title>Vworld Map 생성하기</title>

    <!-- vworld 스크립트 호출 -->

    <script type="text/javascript"

        src="https://map.vworld.kr/js/webglMapInit.js.do?version=2.0&apiKey=767B7ADF-10BA-3D86-AB7E-02816B5B92E9"></script>

</head>


<body>

    <!-- Map을 생성할 부분  -->

    <div id="vmap" style="position: absolute; width:99%;height:100vh;"></div>

    <!-- Map 생성 시 필요한 설정 부분  -->

    <div style="left:10px; position: absolute; z-index: 1; width: 200px; height: 150px; background-color: #ffffff80;">

        <p>

            <input type="button" onclick="vwmap_create()" value="지도호출">

        </p>

        <!-- 경복궁으로 이동하는 이벤트 버튼 -->

        <p>

            <input type="button" onclick="vmap_move(126.97703026981958, 37.57970200648469,  500)" value="경복궁 이동">

        </p>

        <!-- 서귀포시로 이동하는 이벤트 버튼 -->

        <p>

            <input type="button" onclick="vmap_move(126.56102749819851, 33.25313092244775,  500)" value="서귀포시 이동">

        </p>

    </div>

    <script type="text/javascript">

        var map3d = null;

        function vwmap_create() {

            /**

            vw.MapOptions(

                basemapType, // 2D 초기배경지도

                layersArr, // 레이어목록(3D에서 사용안함)

                controlDensity, // 2D지도 전용.

                interactionDensity, // 2D지도 전용.

                controlAutoArrange, // 2D지도 전용.

                homePosition, // 2D,3D 공통 사용.

                initPosition // 2D,3D 공통 사용.

            );

             **/

            var mapOptions = new vw.MapOptions(

                vw.BasemapType.GRAPHIC// 2D 초기배경지도 

                ""// 레이어목룩(3D에서 사용안함)

                vw.DensityType.BASIC// 2D 지도 전용

                vw.DensityType.BASIC// 2D 지도 전용

                false// 2D 지도 전용 

                new vw.CameraPosition(

                    //  vw.CoordZ(X,Y,Z) 클래스 : X(경도), Y(위도), Z(지면으로부터의 높이)

                    new vw.CoordZ(127.42538.1961548700),

                    // vw.Direction(heading,tilt,roll) 클래스 : heading(수평방향 회전각도), tilt(수직방향 회전각도),roll(카메라자체 회전각도)

                    new vw.Direction(-9000)

                ), // 2D, 3D 공통 사용 

                new vw.CameraPosition(

                    new vw.CoordZ(127.42538.1961548700),

                    new vw.Direction(0-900)

                ) // 2D, 3D 공통 사용

            );


            map3d = new vw.Map("vmap", mapOptions);

        }


        /**

         * 이동할 위치와 높이값을 지정

         **/

        function vmap_move(x, y, z) {

            if (!map3d) alert('지도를 먼저 생성하세요!');

            if (!map3d) return null;

            //  좌표 지점, 카메라 포지션 지정 

            var movePo = new vw.CoordZ(x, y, z);

            var mPosi = new vw.CameraPosition(movePo, new vw.Direction(0-800));

            // map 이동 

            map3d.moveTo(mPosi);

        }

    </script>

</body>


</html>

블로그 이미지

미나미나미

,

# vworld 3d Map 생성하기


- map 생성 부분 

vw.Map("맵 위치할 아이디 값", "Map 생성 시 Option정보"); 

var map3d = new vw.Map("vmap", mapOptions);


- MapOption 생성 정보

vw.MapOptions(

                basemapType, // 2D 초기배경지도

                layersArr, // 레이어목록(3D에서 사용안함)

                controlDensity, // 2D지도 전용.

                interactionDensity, // 2D지도 전용.

                controlAutoArrange, // 2D지도 전용.

                homePosition, // 2D,3D 공통 사용.

                initPosition // 2D,3D 공통 사용.

            );


- 결과화면

# 테스트 URL - https://jsbin.com/zelasesihe/1


- 전체소소코드

<!DOCTYPE html>
<html>

<head>
    <meta http-equiv="Content-Type" content="text/html; charset=UTF-8" />
    <title>Vworld Map 생성하기</title>
    <!-- vworld 스크립트 호출 -->
    <script type="text/javascript"
        src="https://map.vworld.kr/js/webglMapInit.js.do?version=2.0&apiKey=767B7ADF-10BA-3D86-AB7E-02816B5B92E9"></script>
</head>

<body>
    <!-- Map을 생성할 부분  -->
    <div id="vmap" style="position: absolute; width:99%;height:100vh;"></div>
    <!-- Map 생성 시 필요한 설정 부분  -->
    <div style="left:10px; position: absolute; z-index: 1; width: 200px; height: 150px; background-color: #ffffff80;">
        <p>
            <input type="button" onclick="vwmap_create()" value="지도호출">
        </p>
    </div>
    <script type="text/javascript">
        function vwmap_create() {
            /**
            vw.MapOptions(
                basemapType, // 2D 초기배경지도
                layersArr, // 레이어목록(3D에서 사용안함)
                controlDensity, // 2D지도 전용.
                interactionDensity, // 2D지도 전용.
                controlAutoArrange, // 2D지도 전용.
                homePosition, // 2D,3D 공통 사용.
                initPosition // 2D,3D 공통 사용.
            );
             **/
            var mapOptions = new vw.MapOptions(
                vw.BasemapType.GRAPHIC, // 2D 초기배경지도 
                "", // 레이어목룩(3D에서 사용안함)
                vw.DensityType.BASIC, // 2D 지도 전용
                vw.DensityType.BASIC, // 2D 지도 전용
                false, // 2D 지도 전용 
                new vw.CameraPosition(
                    //  vw.CoordZ(X,Y,Z) 클래스 : X(경도), Y(위도), Z(지면으로부터의 높이)
                    new vw.CoordZ(127.425, 38.196, 1548700),
                    // vw.Direction(heading,tilt,roll) 클래스 : heading(수평방향 회전각도), tilt(수직방향 회전각도),roll(카메라자체 회전각도)
                    new vw.Direction(-90, 0, 0)
                ), // 2D, 3D 공통 사용 
                new vw.CameraPosition(
                    new vw.CoordZ(127.425, 38.196, 1548700),
                    new vw.Direction(0, -90, 0)
                ) // 2D, 3D 공통 사용
            );

            var map3d = new vw.Map("vmap", mapOptions);
        }
    </script>
</body>

</html>


블로그 이미지

미나미나미

,

[react-beautiful-dnd] react, next.js 드래그 만들기 2


[react-beautiful-dnd] react, next.js 드래그 만들기 2

[react-beautiful-dnd] react, next.js 드래그 만들기 1 [react-beautiful-dnd] react, next.js 드래그 만들기 1 # react-beutiful-dnd 요소를 통한 Drag 만들기 github.com/atlassian/react-beautiful-dnd atlass..

minaminaworld.tistory.com

# 결과화면 


1.  index.js

 - DragLand Component 불러오기

import DragLand from "../components/DragComponent/DragLand"
// import Test from '../components/Test'

const Index = () => {
    return (
        <>
            <div>Hello next.js 10</div>
            <br/>
            {/* Drag Component */}
            <DragLand></DragLand>
        </>
    )
}

export default Index;


2.  DragLand.js

 -DragLand.js ComponentLoad된 시점 Drag Components 불러오기

// React 관련 요소
import React, { useCallback, useEffect, useState, PureComponent } from 'react';
import Drag from './Drag';

const DragLand = () => {
    // window가 로드 된 시점에서 렌더링
    const [winReady, setwinReady] = useState(false);
    useEffect(() => {
        setwinReady(true);
    }, []);

    return (
        <>
            {/* 윈도우, DOM 로드 시점에서 드래그 생성 */}
            {winReady ? <Drag /> : null}
        </>
    );
};

export default DragLand;

3.  Drag.js

 -Drag 요소 만들기

// React 관련 요소
import React, { useCallback, useEffect, useState, PureComponent } from 'react';
// 드래그 요소
import { DragDropContext, Draggable, Droppable } from 'react-beautiful-dnd';
// 스타일 정의 
import styled from 'styled-components';
import '@atlaskit/css-reset';

const DragContent = styled.div`
  border: 1px solid lightgrey;
`;

const Content = styled.div`
  margin: 8px;
  padding : 10px;
  border: 1px solid lightgrey;
  border-radius: 2px;
`;

// 드래그 요소 생성 
const Drag = () => {
    const [datas, setDatas] = useState([
        { key: 'item-1', content: 'item-1' },
        { key: 'item-2', content: 'item-2' },
        { key: 'item-3', content: 'item-3' },
        { key: 'item-4', content: 'item-4' },
    ]);

    const onDragEnd = (result, provided) => {

        if (!result) {
            console.log('result가 null인 경우');
            return;
        }

        // 드래그 결과
        // source : 원본 
        // destination : 변경 
        const { destination, source } = result;

        // 동일한 위치에서 놓은 경우 
        if (destination.index === source.index) {
            console.log('초기 위치 index 동일한 경우');
            return;
        }

        // 데이터 변경
        setDatas((prev) => {
            // 원본 데이터 
            const sourceData = datas[source.index];
            // datas 복사
            let newDatas = prev;
            // 기존 데이터 제거 
            newDatas.splice(source.index, 1);
            // 이동 위치로 데이터 옮기기
            newDatas.splice(destination.index, 0, sourceData);

            return newDatas;
        });

    };

    return (
        <>
            {/* 드래그 영역 */}
            <DragDropContext
                onDragEnd={onDragEnd}
            >
                {/* 드래그 놓을 수 있는 영역 */}
                <Droppable droppableId="DropLand">
                    {/* 드래그 Div 생성 */}
                    {(provided, snapshot) => (
                        // CCS가 적용된 Div
                        <DragContent
                            {...provided.droppableProps}
                            ref={provided.innerRef}
                        >
                            <p>Drag Div!</p>
                            {datas.map((data, index) => (
                                <Draggable key={data.key} draggableId={data.key} index={index}>
                                    {(provided, snapshot) => (
                                        <Content
                                            ref={provided.innerRef}
                                            {...provided.draggableProps}
                                            {...provided.dragHandleProps}
                                        >
                                            {data.content}
                                        </Content>
                                    )}
                                </Draggable>
                            ))}
                            {provided.placeholder}
                        </DragContent>
                    )}
                </Droppable>
            </DragDropContext>
        </>
    )
}

export default Drag;


블로그 이미지

미나미나미

,


[react-beautiful-dnd] react, next.js 드래그 만들기 1


[react-beautiful-dnd] react, next.js 드래그 만들기 1

# react-beutiful-dnd 요소를 통한 Drag 만들기 github.com/atlassian/react-beautiful-dnd atlassian/react-beautiful-dnd Beautiful and accessible drag and drop for lists with React - atlassian/react-beau..

minaminaworld.tistory.com


1.   npm i styled-components

   - css 적용하기 위해서 설치 

2.  npm i react-beautiful-dnd

    - drag을 위해서 설치 

3. npm i @atlaskit/css-reset

   - drag 생성할 때, 필요한 요소라고 함. (공식 문서에서 추가 요소)


사용 방법

4. package.json

   - 설치된 요소

블로그 이미지

미나미나미

,

# react-beutiful-dnd 요소를 통한 Drag 만들기

github.com/atlassian/react-beautiful-dnd


atlassian/react-beautiful-dnd

Beautiful and accessible drag and drop for lists with React - atlassian/react-beautiful-dnd

github.com


1. package.json 생성 

2. react 요소 설치


3. next 설치 

4. next 실행

블로그 이미지

미나미나미

,

# 에러 상황

  - Next.js에서 react-beautiful-dnd을 적용할 때, 드래그가 제대로 동작하지 않은 경우.   


package.json


# 문제점 

 - 문제가 되는 이유는 컴포넌트가 로드 되기 전, DOM, Window가 먼저 로드되지 않는 상황이라고 판단됨.


 # 해결 방안 


  - useEffect를 통해서 Window, DOM이 렌더링 된 시점에서 드래그 요소 렌더링.


# 결과화면 


블로그 이미지

미나미나미

,


# RegBean.java

package com.example.demo;

public class RegBean {

    private String beanName;
    private int beanInt;

    public void setBeanInt(int beanInt) {
        this.beanInt = beanInt;
    }

    public void setBeanName(String beanName) {
        this.beanName = beanName;
    }

    public int getBeanInt() {
        return beanInt;
    }

    public String getBeanName() {
        return beanName;
    }

    @Override
    public String toString() {
        return "RegBean{" +
                "beanName='" + beanName + '\'' +
                ", beanInt=" + beanInt +
                '}';
    }
}

# RegBeanConfiguration.java

@Configuration
@EnableConfigurationProperties(RegBeanProperties.class)
public class RegBeanConfiguration {

    @Bean
    @ConditionalOnMissingBean // 이 타입에 Bean 없을 때만 등록
    public RegBean regBean(RegBeanProperties properties) {
        RegBean regBean = new RegBean();
        regBean.setBeanInt(properties.getBeanInt());
        regBean.setBeanName(properties.getBeanName());
        return regBean;
    }
}

# RegBeanProperties.java

pom.xml에 등록해야함.


// 소문자 가능함.
@ConfigurationProperties("reg-bean")
public class RegBeanProperties {

    private String beanName;
    private int beanInt;

    public void setBeanInt(int beanInt) {
        this.beanInt = beanInt;
    }

    public void setBeanName(String beanName) {
        this.beanName = beanName;
    }

    public int getBeanInt() {
        return beanInt;
    }

    public String getBeanName() {
        return beanName;
    }

}

# Maven Install


1. pom.xml 특정 jar 가져오기

        <dependency>
            <groupId>com.example</groupId>
            <artifactId>AutoconfigurationSub</artifactId>
            <version>0.0.1-SNAPSHOT</version>
        </dependency>


2.  가져온 Bean 값 활용하기 

@Component
public class RegBeanRunner implements ApplicationRunner {

    private static final Logger logger = LoggerFactory.getLogger(RegBeanRunner.class);

    @Autowired
    RegBean regBean;

    @Override
    public void run(ApplicationArguments args) throws Exception {

        logger.info("regBean=" + regBean.toString());
    }
}


3. application.properties에서 프로퍼티즈 등록하기 

logging.level.root=debug
reg-bean.beanInt=10
reg-bean.beanName=RegBeanTest


4. 결과 


블로그 이미지

미나미나미

,

hooks 방식의 컴포넌트 생명 주기

# 맨 아래의 전체 소스 코드가 있습니다.


# 클래식 방식의 컴포넌트 주기 : minaminaworld.tistory.com/196


[react - 기초] class 방식의 컴포넌트 생명 주기

class 방식의 컴포넌트 생명 주기 # 맨 아래의 전체 소스 코드가 있습니다.  # 리액트 공식문서 : https://ko.reactjs.org/docs/react-component.html React.Component – React A JavaScript library for b..

minaminaworld.tistory.com


# Hooks 방식의 경우, Class와는 다르게 componentDidMount, componentDidUpdate, componentWillUnmount 처럼 명확하게 나누어져 있지 않음. 그러나 useEffect만으로 구현이 가능함.

 // class 방식의 componentDidMout
  useEffect(() => {
    console.log('componentDidMout -------------------------');
    console.log('component가 실행될 때만 동작합니다.');
    console.log(' ------------------------- componentDidMout');
  }, []);

  // class 방식의 componentDidUpdate 동작
  // 배열 요소의 변경이 있을 때만 동작함
  useEffect(() => {
    console.log('componentDidUpdate -------------------------');
    // 값의 변화에 대응
    if (num) {
      console.log('num=', num);
    }
    console.log('-------------------------componentDidUpdate ');
  }, [num]);

  // class 방식의 componentDidUpdate 동작
  // 배열 요소의 변경이 있을 때만 동작함
  useEffect(() => {
    return () => {
      console.log('componentWillUnmount-------------------------');
      console.log('componentWillUnmount 동작함');
      console.log('-------------------------componentWillUnmount ');
    };
  }, [num]);


# 컴포넌트 시작 시 useEffect 실행.

# 값 변화로 인한 useEffect 실행.

# 값 변화로 인한 DOM의 종료로 인한 useEffect 실행.


# 전체소스코드

import React, { memo, useEffect, useState } from "react";

const useEffectTest = () => {
  const [title, setTitle] = useState("ComponentMountTest");
  const [num, setNum] = useState(0);

  // class 방식의 componentDidMout
  useEffect(() => {
    console.log('componentDidMout -------------------------');
    console.log('component가 실행될 때만 동작합니다.');
    console.log(' ------------------------- componentDidMout');
  }, []);

  // class 방식의 componentDidUpdate 동작
  // 배열 요소의 변경이 있을 때만 동작함
  useEffect(() => {
    console.log('componentDidUpdate -------------------------');
    // 값의 변화에 대응
    if (num) {
      console.log('num=', num);
    }
    console.log('-------------------------componentDidUpdate ');
  }, [num]);

  // class 방식의 componentDidUpdate 동작
  // 배열 요소의 변경이 있을 때만 동작함
  useEffect(() => {
    return () => {
      console.log('componentWillUnmount-------------------------');
      console.log('componentWillUnmount 동작함');
      console.log('-------------------------componentWillUnmount ');
    };
  }, [num]);

  const onIncreseNum = () => {
    console.log("onIncreseNum");
    setNum((prevNum) => {
      return prevNum + 1;
    });
  };

  const onDecreseNum = (sign) => (e) => {
    console.log("onDecreseNum");
    console.log(`sign ${sign}`);
    setNum((prevNum) => {
      return prevNum - 1;
    });
  };

  return (
    <>
      <h1>{title}</h1>
      <h1>{num}</h1>
      <button onClick={onIncreseNum}>+</button>
      <button onClick={onDecreseNum('-')}>-</button>
    </>
  );
};

export default useEffectTest;
블로그 이미지

미나미나미

,