# 스프링 JSP에서 HTML로 설정 변경하기 


1. web.xml의 추가 부분 ( 추가 부분을 확인하세요.)

<?xml version="1.0" encoding="UTF-8"?>
<web-app version="2.5" xmlns="http://java.sun.com/xml/ns/javaee" xmlns:xsi="http://www.w3.org/2001/XMLSchema-instance" xsi:schemaLocation="http://java.sun.com/xml/ns/javaee https://java.sun.com/xml/ns/javaee/web-app_2_5.xsd">

	<!-- The definition of the Root Spring Container shared by all Servlets and Filters -->
	<context-param>
		<param-name>contextConfigLocation</param-name>
		<param-value>/WEB-INF/spring/root-context.xml</param-value>
	</context-param>

	<!-- Creates the Spring Container shared by all Servlets and Filters -->
	<listener>
		<listener-class>org.springframework.web.context.ContextLoaderListener</listener-class>
	</listener>

	<!-- Processes application requests -->
	<servlet>
		<servlet-name>appServlet</servlet-name>
		<servlet-class>org.springframework.web.servlet.DispatcherServlet</servlet-class>
		<init-param>
			<param-name>contextConfigLocation</param-name>
			<param-value>/WEB-INF/spring/appServlet/servlet-context.xml</param-value>
		</init-param>
		<load-on-startup>1</load-on-startup>
	</servlet>

	<!-- 추가 부분 시작 : HTML 설정 부분 -->
	<servlet>
		<servlet-name>htmlServlet</servlet-name>
		<servlet-class>org.apache.jasper.servlet.JspServlet</servlet-class>
		<load-on-startup>2</load-on-startup>
	</servlet>

	<servlet-mapping>
		<servlet-name>htmlServlet</servlet-name>
		<url-pattern>*.html</url-pattern>
	</servlet-mapping>
	<!-- 추가 부분 끝 : HTML 설정 부분 -->


	<servlet-mapping>
		<servlet-name>appServlet</servlet-name>
		<url-pattern>/</url-pattern>
	</servlet-mapping>


	<!-- 한글설정 -->
	<filter>
		<filter-name>encodingFilter</filter-name>
		<filter-class>
			org.springframework.web.filter.CharacterEncodingFilter
		</filter-class>
		<init-param>
			<param-name>encoding</param-name>
			<param-value>UTF-8</param-value>
		</init-param>
		<init-param>
			<param-name>forceEncoding</param-name>
			<param-value>true</param-value>
		</init-param>
	</filter>

	<filter-mapping>
		<filter-name>encodingFilter</filter-name>
		<url-pattern>/*</url-pattern>
	</filter-mapping>
	<!-- 한글설정 END -->


</web-app>


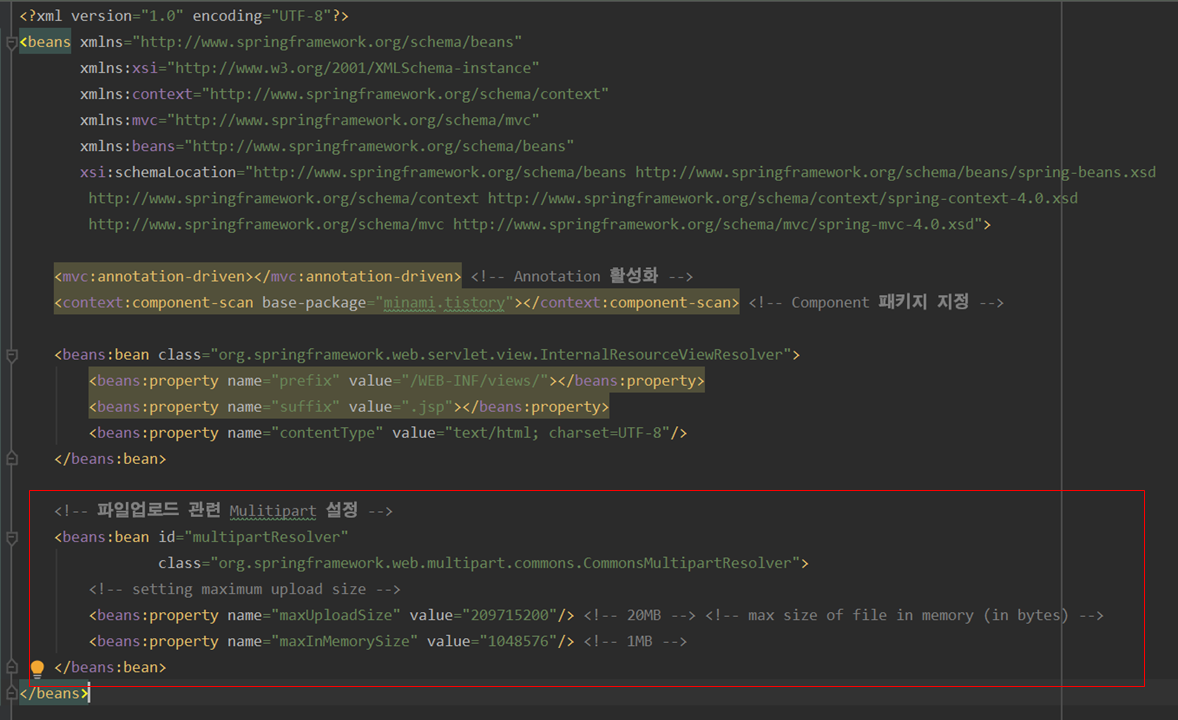
2. servlet-context.html의 suffix를 html로 변경

   <beans:property name="suffix" value=".jsp" />를

   <beans:property name="suffix" value=".html" />로 변경

<?xml version="1.0" encoding="UTF-8"?>
<beans:beans xmlns="http://www.springframework.org/schema/mvc"
	xmlns:xsi="http://www.w3.org/2001/XMLSchema-instance"
	xmlns:beans="http://www.springframework.org/schema/beans"
	xmlns:context="http://www.springframework.org/schema/context"
	xsi:schemaLocation="http://www.springframework.org/schema/mvc https://www.springframework.org/schema/mvc/spring-mvc.xsd
		http://www.springframework.org/schema/beans https://www.springframework.org/schema/beans/spring-beans.xsd
		http://www.springframework.org/schema/context https://www.springframework.org/schema/context/spring-context.xsd">

	<!-- DispatcherServlet Context: defines this servlet's request-processing infrastructure -->
	
	<!-- Enables the Spring MVC @Controller programming model -->
	<annotation-driven />

	<!-- Handles HTTP GET requests for /resources/** by efficiently serving up static resources in the ${webappRoot}/resources directory -->
	<resources mapping="/resources/**" location="/resources/" />

	<!-- Resolves views selected for rendering by @Controllers to .jsp resources in the /WEB-INF/views directory -->
	<beans:bean class="org.springframework.web.servlet.view.InternalResourceViewResolver">
		<beans:property name="prefix" value="/WEB-INF/views/" />
		<!-- jsp을 html로 변경 -->
		<beans:property name="suffix" value=".html" />
		
	</beans:bean>
	
	<context:component-scan base-package="com.example.thymeleaf" />


</beans:beans>


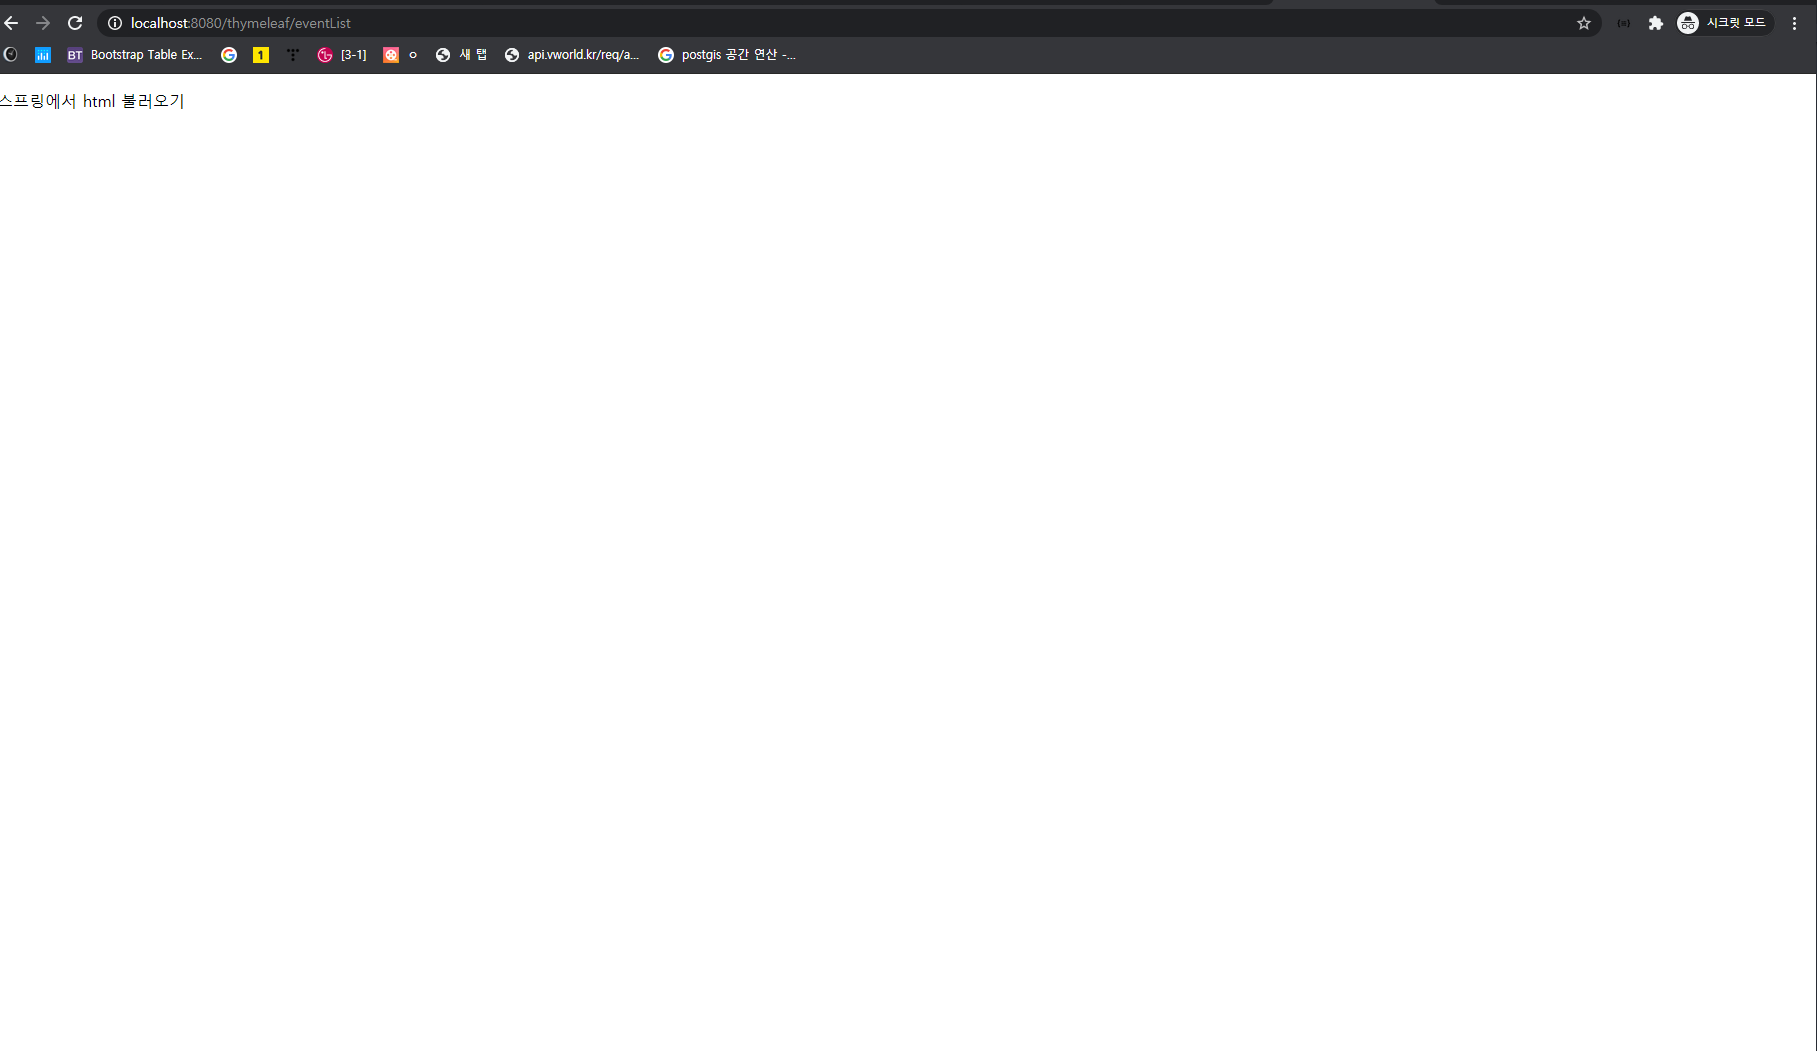
3. eventList.html 파일 불러오기


- HTML 파일

<%@ page language="java" contentType="text/html; charset=utf-8" pageEncoding="utf-8"%>
<!DOCTYPE html>
<html>

<head>
    <meta http-equiv="Content-Type" content="text/html; charset=EUC-KR">
    <title>Insert title here</title>
</head>

<body>
    <p>스프링에서 html 불러오기</p>
</body>

</html>

- EventController.java

package com.example.thymeleaf;

import javax.servlet.http.HttpServletRequest;
import javax.servlet.http.HttpServletResponse;

import org.springframework.stereotype.Controller;
import org.springframework.web.bind.annotation.GetMapping;

@Controller
public class EventController {

	@GetMapping("eventList")
	public String eventList(HttpServletRequest request, HttpServletResponse response) {
		return "eventList";
	}
	
}

4. 결과화면


블로그 이미지

미나미나미

,

Spring MVC 파일업로드 Multipart의 경우 몇가지 설정을 해야합니다.


1. pom.xml 파일업로드 관련 의존성 추가

<!--  파일업로드  -->
        <dependency>
            <groupId>commons-fileupload</groupId>
            <artifactId>commons-fileupload</artifactId>
            <version>1.3.2</version>
        </dependency> <!-- https://mvnrepository.com/artifact/commons-io/commons-io -->
        <dependency>
            <groupId>commons-io</groupId>
            <artifactId>commons-io</artifactId>
            <version>2.5</version>
        </dependency>
        <!--  파일업로드  -->


2. dispatcher-servlet.xml(이클립스 경우, servlet-context.xml)에 multipart 부분 설정 

 <!-- 파일업로드 관련 Mulitipart 설정 -->
    <beans:bean id="multipartResolver"
                class="org.springframework.web.multipart.commons.CommonsMultipartResolver">
        <!-- 
        	setting maximum upload size
            최대 크기 설정
            <beans:property name="maxUploadSize" value="-1"/>
        -->
        <beans:property name="maxUploadSize" value="209715200"/> <!-- 20MB --> <!-- max size of file in memory (in bytes) -->
        <beans:property name="maxInMemorySize" value="1048576"/> <!-- 1MB -->
    </beans:bean>


3. web.xml에 multipart 부분 설정

 <!-- MultipartFilter 적용 -->
    <filter>
        <filter-name>MultipartFilter</filter-name>
        <filter-class>org.springframework.web.multipart.support.MultipartFilter</filter-class>
    </filter>
    <filter-mapping>
        <filter-name>MultipartFilter</filter-name>
        <url-pattern>/*</url-pattern>
    </filter-mapping>
    <!-- MultipartFilter 적용 -->


4. tomcat 설정하기(본인 설치한 톰캣 설정 파일) - 톰캣 - conf - context.xml

<?xml version="1.0" encoding="UTF-8"?>
<!--
  Licensed to the Apache Software Foundation (ASF) under one or more
  contributor license agreements.  See the NOTICE file distributed with
  this work for additional information regarding copyright ownership.
  The ASF licenses this file to You under the Apache License, Version 2.0
  (the "License"); you may not use this file except in compliance with
  the License.  You may obtain a copy of the License at

      http://www.apache.org/licenses/LICENSE-2.0

  Unless required by applicable law or agreed to in writing, software
  distributed under the License is distributed on an "AS IS" BASIS,
  WITHOUT WARRANTIES OR CONDITIONS OF ANY KIND, either express or implied.
  See the License for the specific language governing permissions and
  limitations under the License.
-->
<!-- The contents of this file will be loaded for each web application -->
<Context allowCasualMultipartParsing="true">
	<!-- Context와 아래 Resource 부분 변경 해결 -->
	<Resources cachingAllowed="true" cacheMaxSize="100000"></Resources>

    <!-- Default set of monitored resources. If one of these changes, the    -->
    <!-- web application will be reloaded.                                   -->
    <WatchedResource>WEB-INF/web.xml</WatchedResource>
    <WatchedResource>${catalina.base}/conf/web.xml</WatchedResource>

	
    <!-- Uncomment this to disable session persistence across Tomcat restarts -->
    <!--
    <Manager pathname="" />
    -->
</Context>


5. tomcat 설정하기(본인 설치한 톰캣 설정 파일) - 톰캣 - conf - server.xml

 - body로 전송할 수 있는 사이즈 defalut 2mb를 최대 2gb으로 변경.

 - the configured maximum ...... 에러 발생시 처리할 부분..

<Connector port="8080" protocol="HTTP/1.1"
               connectionTimeout="20000"
               redirectPort="8443" 
			   maxPostSize="-1"/>
블로그 이미지

미나미나미

,

@GepMapping 테스트 해보기


1. 단순 컨트롤러 테스트 해보기 

  1-1. 컨트롤러 소스(SimpleMappingController.java)

// SimpleMappingController.java
// localhost:8080/SimpleMapping1 으로 페이지 불러오기
    @GetMapping("/SimpleMapping1")
    public String SimpleMapping1(){
        // views/SimpleMapping/SimpleMapping1.jsp 페이지
        return "SimpleMapping/SimpleMapping1";
    }

  1-2. 테스트 코드(SimpleMappingControllerTest.java)

// SimpleMappingControllerTest.java
@Test
    public void simpleMapping1() throws Exception{
        // 페이지 요청시 성공적으로 처리
        mockMvc.perform(get("/SimpleMapping1"))
                .andDo(print()) // 처리 내용을 출력
                .andExpect(status().isOk()) // 200
                .andExpect(forwardedUrl("SimpleMapping/SimpleMapping1")) //
                ;

        // 페이지 요청시 /123 부분으로 404 에러
        mockMvc.perform(get("/SimpleMapping1/123"))
                .andDo(print()) // 처리 내용을 출력
                .andExpect(status().isNotFound()) // 404 에러
        ;

        // 페이지 요청시 /zzzzz 부분으로 404 에러가 일어남으로 400번대 에러임을 확인 
        mockMvc.perform(get("/SimpleMapping1/zzzzzz"))
                .andDo(print()) // 처리 내용을 출력
                .andExpect(status().is4xxClientError()) // 400 번대 에러일 경우
        ;
    }

2. 컨트롤러의 path의 숫자 또는 영문 받기 

  2-1. 컨트롤러 소스 코드(SimpleMappingController.java)

// SimpleMappingController.java
   // localhost:8080/SimpleMapping1 으로 페이지 불러오기
    @GetMapping("/SimpleMapping2/{number:[1-9]+}")
    public String SimpleMapping2Number(@PathVariable String number){
        System.out.println("number = > " + number);
        // views/SimpleMapping/SimpleMapping1.jsp 페이지
        return "SimpleMapping/SimpleMapping1";
    }

    // localhost:8080/SimpleMapping1 으로 페이지 불러오기
    @GetMapping("/SimpleMapping2/{characters:[a-z]+}")
    public String SimpleMapping2String(@PathVariable String characters){
        System.out.println("characters = > " + characters);
        // views/SimpleMapping/SimpleMapping1.jsp 페이지
        return "SimpleMapping/SimpleMapping1";
    }

 2-2. 테스트 코드(SimpleMappingControllerTest.java)

@Test
    public void simpleMapping2() throws Exception{
        // 페이지 요청시 number 또는 characters 없음으로 404 에러
        mockMvc.perform(get("/SimpleMapping2"))
                .andDo(print()) // 처리 내용을 출력
                .andExpect(status().isNotFound()) // 404
        ;

        // 페이지 요청시 number
        mockMvc.perform(get("/SimpleMapping2/123123"))
                .andDo(print()) // 처리 내용을 출력
                .andExpect(status().isOk()) // 200
                .andExpect(forwardedUrl("SimpleMapping/SimpleMapping1")) //
        ;

        // 페이지 요청시 characters
        mockMvc.perform(get("/SimpleMapping2/asdasda"))
                .andDo(print()) // 처리 내용을 출력
                .andExpect(status().isOk()) // 200
                .andExpect(forwardedUrl("SimpleMapping/SimpleMapping1")) //
        ;
    }

3. 컨트롤러의 여러 패스를 받는 경우 / 하나의 패스를 받는 경우  

  3-1. 컨트롤러 소스 코드(SimpleMappingController.java)

   // "SimpleMapping3/"만 맞는 다면, 모든 다 받는다(ex: "test/123" , "test" , "test/1111/1123123")
    @GetMapping("/SimpleMapping3/**")
    @ResponseBody
    public String SimpleMapping3Multi(HttpServletRequest request){
        System.out.println("SimpleMapping3Multi");
        System.out.println("request.getRequestURI() = > " + request.getRequestURI());
        return "SimpleMapping3Multi " + request.getRequestURI();
    }

    // "SimpleMapping3/" 아래의 한 패스만 받는다, (ex: "test" , "zzzzz" , "1123123")
    @GetMapping("/SimpleMapping3/*")
    @ResponseBody
    public String SimpleMapping3Simple(HttpServletRequest request){
        System.out.println("SimpleMapping3Simple");
        System.out.println("request.getRequestURI() = > " + request.getRequestURI());
        return "SimpleMapping3Simple " + request.getRequestURI();
    }

3-2. 테스트 코드(SimpleMappingControllerTest.java)

@Test
    public void simpleMapping3() throws Exception{
        // 페이지 요청시 number 또는 characters 없음으로 404 에러
        mockMvc.perform(get("/SimpleMapping3"))
                .andDo(print()) // 처리 내용을 출력
                .andExpect(status().isOk()) // 200
                .andExpect(content().string("SimpleMapping3Multi " + "/SimpleMapping3"))
        ;

        // 페이지 요청시 number 또는 characters 없음으로 404 에러
        mockMvc.perform(get("/SimpleMapping3/123/zzzzaaa"))
                .andDo(print()) // 처리 내용을 출력
                .andExpect(status().isOk()) // 200
                .andExpect(content().string("SimpleMapping3Multi " + "/SimpleMapping3/123/zzzzaaa"))
        ;

        // 페이지 요청시 number 또는 characters 없음으로 404 에러
        mockMvc.perform(get("/SimpleMapping3/zzaseqwe123"))
                .andDo(print()) // 처리 내용을 출력
                .andExpect(status().isOk()) // 200
                .andExpect(content().string("SimpleMapping3Simple " + "/SimpleMapping3/zzaseqwe123"))
        ;
    }

4. 결과 화면 


5. 소스 코드

  컨트롤러 코드  

더보기

//  컨트롤러 소스 코드(SimpleMappingController.java)
import org.springframework.stereotype.Controller;
import org.springframework.web.bind.annotation.GetMapping;
import org.springframework.web.bind.annotation.PathVariable;
import org.springframework.web.bind.annotation.ResponseBody;

import javax.servlet.http.HttpServletRequest;

@Controller
public class SimpleMappingController {

    // localhost:8080/SimpleMapping1 으로 페이지 불러오기
    @GetMapping("/SimpleMapping1")
    public String SimpleMapping1(){
        // views/SimpleMapping/SimpleMapping1.jsp 페이지
        return "SimpleMapping/SimpleMapping1";
    }

    // localhost:8080/SimpleMapping1 으로 페이지 불러오기
    @GetMapping("/SimpleMapping2/{number:[1-9]+}")
    public String SimpleMapping2Number(@PathVariable String number){
        System.out.println("number = > " + number);
        // views/SimpleMapping/SimpleMapping1.jsp 페이지
        return "SimpleMapping/SimpleMapping1";
    }

    // localhost:8080/SimpleMapping1 으로 페이지 불러오기
    @GetMapping("/SimpleMapping2/{characters:[a-z]+}")
    public String SimpleMapping2String(@PathVariable String characters){
        System.out.println("characters = > " + characters);
        // views/SimpleMapping/SimpleMapping1.jsp 페이지
        return "SimpleMapping/SimpleMapping1";
    }

    // "SimpleMapping3/"만 맞는 다면, 모든 다 받는다(ex: "test/123" , "test" , "test/1111/1123123")
    @GetMapping("/SimpleMapping3/**")
    @ResponseBody
    public String SimpleMapping3Multi(HttpServletRequest request){
        System.out.println("SimpleMapping3Multi");
        System.out.println("request.getRequestURI() = > " + request.getRequestURI());
        return "SimpleMapping3Multi " + request.getRequestURI();
    }

    // "SimpleMapping3/" 아래의 한 패스만 받는다, (ex: "test" , "zzzzz" , "1123123")
    @GetMapping("/SimpleMapping3/*")
    @ResponseBody
    public String SimpleMapping3Simple(HttpServletRequest request){
        System.out.println("SimpleMapping3Simple");
        System.out.println("request.getRequestURI() = > " + request.getRequestURI());
        return "SimpleMapping3Simple " + request.getRequestURI();
    }

}


테스트 코드 

더보기

// 테스트 코드(SimpleMappingControllerTest.java)
import org.junit.Before;
import org.junit.Test;
import org.mockito.InjectMocks;
import org.mockito.MockitoAnnotations;
import org.springframework.test.web.servlet.MockMvc;
import org.springframework.test.web.servlet.setup.MockMvcBuilders;

import static org.springframework.test.web.servlet.request.MockMvcRequestBuilders.get;
import static org.springframework.test.web.servlet.result.MockMvcResultHandlers.print;
import static org.springframework.test.web.servlet.result.MockMvcResultMatchers.*;

public class SimpleMappingControllerTest {

    @InjectMocks
    private SimpleMappingController simpleMappingController;

    private MockMvc mockMvc;

    // @Test 메소드 실행전 셋업 메소드
    @Before
    public void setup() {
        MockitoAnnotations.initMocks(this);
        this.mockMvc = MockMvcBuilders.standaloneSetup(this.simpleMappingController).build();
    }

    @Test
    public void simpleMapping1() throws Exception{
        // 페이지 요청시 성공적으로 처리
        mockMvc.perform(get("/SimpleMapping1"))
                .andDo(print()) // 처리 내용을 출력
                .andExpect(status().isOk()) // 200
                .andExpect(forwardedUrl("SimpleMapping/SimpleMapping1")) //
                ;

        // 페이지 요청시 /123 부분으로 404 에러
        mockMvc.perform(get("/SimpleMapping1/123"))
                .andDo(print()) // 처리 내용을 출력
                .andExpect(status().isNotFound()) // 404 에러
        ;

        // 페이지 요청시 /zzzzz 부분으로 404 에러가 일어남으로 400번대 에러임을 확인
        mockMvc.perform(get("/SimpleMapping1/zzzzzz"))
                .andDo(print()) // 처리 내용을 출력
                .andExpect(status().is4xxClientError()) // 400 번대 에러일 경우
        ;
    }

    @Test
    public void simpleMapping2() throws Exception{
        // 페이지 요청시 number 또는 characters 없음으로 404 에러
        mockMvc.perform(get("/SimpleMapping2"))
                .andDo(print()) // 처리 내용을 출력
                .andExpect(status().isNotFound()) // 404
        ;

        // 페이지 요청시 number
        mockMvc.perform(get("/SimpleMapping2/123123"))
                .andDo(print()) // 처리 내용을 출력
                .andExpect(status().isOk()) // 200
                .andExpect(forwardedUrl("SimpleMapping/SimpleMapping1")) //
        ;

        // 페이지 요청시 characters
        mockMvc.perform(get("/SimpleMapping2/asdasda"))
                .andDo(print()) // 처리 내용을 출력
                .andExpect(status().isOk()) // 200
                .andExpect(forwardedUrl("SimpleMapping/SimpleMapping1")) //
        ;
    }

    @Test
    public void simpleMapping3() throws Exception{
        // 페이지 요청시 number 또는 characters 없음으로 404 에러
        mockMvc.perform(get("/SimpleMapping3"))
                .andDo(print()) // 처리 내용을 출력
                .andExpect(status().isOk()) // 200
                .andExpect(content().string("SimpleMapping3Multi " + "/SimpleMapping3"))
        ;

        // 페이지 요청시 number 또는 characters 없음으로 404 에러
        mockMvc.perform(get("/SimpleMapping3/123/zzzzaaa"))
                .andDo(print()) // 처리 내용을 출력
                .andExpect(status().isOk()) // 200
                .andExpect(content().string("SimpleMapping3Multi " + "/SimpleMapping3/123/zzzzaaa"))
        ;

        // 페이지 요청시 number 또는 characters 없음으로 404 에러
        mockMvc.perform(get("/SimpleMapping3/zzaseqwe123"))
                .andDo(print()) // 처리 내용을 출력
                .andExpect(status().isOk()) // 200
                .andExpect(content().string("SimpleMapping3Simple " + "/SimpleMapping3/zzaseqwe123"))
        ;
    }
}

블로그 이미지

미나미나미

,

@@GetMapping을 사용한 페이지를 가져오기

1. 단순 페이지 불러오기

// localhost:8080/SimpleMapping1 으로 페이지 불러오기
    @GetMapping("SimpleMapping1")
    public String SimpleMapping1(){
        // views/SimpleMapping/SimpleMapping1.jsp 페이지
        return "SimpleMapping/SimpleMapping1";
    }


2. 페이지 숫자만 받기 / 영어문자로만 받기

    // localhost:8080/SimpleMapping1 으로 페이지 불러오기
    @GetMapping("/SimpleMapping2/{number:[1-9]+}")
    public String SimpleMapping2Number(@PathVariable String number){
        System.out.println("number = > " + number);
        // views/SimpleMapping/SimpleMapping1.jsp 페이지
        return "SimpleMapping/SimpleMapping1";
    }

    // localhost:8080/SimpleMapping1 으로 페이지 불러오기
    @GetMapping("/SimpleMapping2/{characters:[a-z]+}")
    public String SimpleMapping2String(@PathVariable String characters){
        System.out.println("characters = > " + characters);
        // views/SimpleMapping/SimpleMapping1.jsp 페이지
        return "SimpleMapping/SimpleMapping1";
    }

 2-1. 숫자로만 매핑 결과 

2-2. 영어로만 매핑 결과 


3. 페이지 요청 모든 패스 받기 / 한 패스만 받기 

    // "SimpleMapping3/"만 맞는 다면, 모든 다 받는다(ex: "test/123" , "test" , "test/1111/1123123")
    @GetMapping("/SimpleMapping3/**")
    @ResponseBody
    public String SimpleMapping3Multi(HttpServletRequest request){
        System.out.println("SimpleMapping3Multi");
        System.out.println("request.getRequestURI() = > " + request.getRequestURI());
        return "SimpleMapping3Multi " + request.getRequestURI();
    }

    // "SimpleMapping3/" 아래의 한 패스만 받는다, (ex: "test" , "zzzzz" , "1123123")
    @GetMapping("/SimpleMapping3/*")
    @ResponseBody
    public String SimpleMapping3Simple(HttpServletRequest request){
        System.out.println("SimpleMapping3Simple");
        System.out.println("request.getRequestURI() = > " + request.getRequestURI());
        return "SimpleMapping3Simple " + request.getRequestURI();
    }

3 - 1. 모든 패스 받기

 3 - 2. 한 패스 받기 


블로그 이미지

미나미나미

,

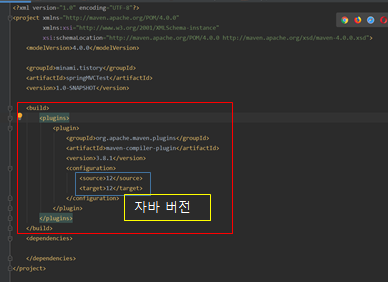
[Spring 에러] intellij release version 5/11/12 not supported


1. File - project structure - Project에서 사용할 자바 버전 체크 및 확인

2. File - Settings - Build, Execution, Deployment - Java Compiler에서 자바 컴파일 확인 

3. pom.xml에 "org.apache.maven.plugins"를 추가 


<build>
        <plugins>
            <plugin>
                <groupId>org.apache.maven.plugins</groupId>
                <artifactId>maven-compiler-plugin</artifactId>
                <version>3.8.1</version>
                <configuration>
                    <source>12</source>
                    <target>12</target>
                </configuration>
            </plugin>
        </plugins>
    </build>


블로그 이미지

미나미나미

,

1. AOP(Aspect Orient Programing)


   - 객체 지향 소프트웨어 개발에서 횡단 관심사 또는 크로스커팅 관심사(cross-cutting concerns)는 다른 관심사에 영향을 미치는 프로그램의 애스펙트이다.

   - 요구 사항에 대해 핵심 관심사항과 횡단 관심사항으로 분할, 개발, 통합하여 모듈화를 극대화하는 프로그램 기법


=> 결국, 횡단 관심 요소들의 처리를 모듈화를 통한 효율적으로 극복


2. AOP의 구성요소

    - 핵심 관심 : 시스템의 핵심 가치와 목적이 드러난 관심 영역

    - 횡단 관심 : 쉽게 분리된 모듈로 작성하기 힘든 요구 사항, 공통 모듈 

    - Joint Point : 합류 지점, 메소드 실행시점 

    - Pointcut : 어디에 적용할 것인가, 계좌이체, 입출금, 이자 계산 적용대상  

    - Aspect : 모듈 

    - Advice : 해야할일 


3.  AOP 해보기(Spring Boot 사용)

   - 패키지 목록 


   3-1. pom.xml에 aop 요소

<dependency>
            <groupId>org.springframework.boot</groupId>
            <artifactId>spring-boot-starter-aop</artifactId>
        </dependency>


 3-2. Aop 적용할 커스텀 어노테이션 생성(AopAnnotation.java)

import java.lang.annotation.*;

/**
 * 커스텀 어노테이션<br/>
 * Documented : javadoc으로 문서 생성 시 현재 어노테이션 설명 추가 <br/>
 * Retention : 어노테이션을 유지하는 정책 설정<br/>
 * Target : 어노테이션 적용 위치
 */
@Documented
@Retention(RetentionPolicy.CLASS)
@Target(ElementType.METHOD)
public @interface AopAnnotation {
}


3-3. 테스트할 서비스(클래스) 작성(AopService.java)

import org.springframework.stereotype.Service;

@Service
public class AopService {

    @AopAnnotation
    public void print(){
        System.out.println("Aop Service print문 실행");
    }

    @AopAnnotation
    public int returnIntValue(){
        System.out.println("returnIntValue 에서 값 10 return 합니다");
        return 10;
    }
}


3-4. AOP 클래스 생성(AopClass.java)

import org.aspectj.lang.ProceedingJoinPoint;
import org.aspectj.lang.annotation.Around;
import org.aspectj.lang.annotation.Aspect;
import org.springframework.stereotype.Component;

@Component
@Aspect
public class AopClass {

    @Around("@annotation(AopAnnotation)")
    public Object aopTest(ProceedingJoinPoint proceedingJoinPoint) throws Throwable{
        System.out.println("AopClass aopTest @Around @annotation(AopAnnotation) 동작");
        Object resultValue = proceedingJoinPoint.proceed();
        System.out.println("resultValue = > " + resultValue);
        return resultValue;
    }

    @Around("@annotation(AopAnnotation)")
    public Object aopTest2(ProceedingJoinPoint proceedingJoinPoint) throws Throwable{
        System.out.println("AopClass aopTest2 @Around @annotation(AopAnnotation) 동작");
        Object resultValue = proceedingJoinPoint.proceed();
        return resultValue;
    }
}


3-5. AppRunner 작성 (AppRunner.java)

import org.springframework.beans.factory.annotation.Autowired;
import org.springframework.boot.ApplicationArguments;
import org.springframework.boot.ApplicationRunner;
import org.springframework.stereotype.Component;

@Component
public class AppRunner implements ApplicationRunner {

    @Autowired
    AopService aopService;


    @Override
    public void run(ApplicationArguments args) throws Exception {
        aopService.print();
        aopService.returnIntValue();
    }
}

4. 결과화면 

블로그 이미지

미나미나미

,


1. Spring Validataion Annotation 종류

    # hibernate 공식 문서 :  http://hibernate.org/validator/

    # hibernate annotation 종류 : https://docs.jboss.org/hibernate/stable/validator/reference/en-US/html_single/#section-builtin-constraints


The Bean Validation reference implementation. - Hibernate Validator

Express validation rules in a standardized way using annotation-based constraints and benefit from transparent integration with a wide variety of frameworks.

hibernate.org

2. pom.xml에 hibernate 의존성 추가

 <dependency>
            <groupId>org.hibernate.validator</groupId>
            <artifactId>hibernate-validator</artifactId>
            <version>6.0.8.Final</version>
        </dependency>

3. VO 생성하기

package VO;

import javax.validation.constraints.*;

public class JoinVO {

    // 길이 지정
    @Size(min = 5 , max = 20 , message = "5 - 20 사이에 글자")
    private String id;

    // 길이 지정
    @Size(min = 5 , max = 20 , message = "5 - 20 사이에 글자")
    private String pw;

    // 0 - 99 구간 , 소수점 허용 안함
    @Digits(integer = 2, fraction = 0)
    @Min(0)
    @Max(99)
    private int age;

    // 이메일 형식 체크
    @Email(message = "이메일 형식에 맞게 넣으세요")
    private String email;

    private String information;

    private String hobby;

    public String getId() {
        return id;
    }

    public void setId(String id) {
        this.id = id;
    }

    public String getPw() {
        return pw;
    }

    public void setPw(String pw) {
        this.pw = pw;
    }

    public int getAge() {
        return age;
    }

    public void setAge(int age) {
        this.age = age;
    }

    public String getInformation() {
        return information;
    }

    public void setInformation(String information) {
        this.information = information;
    }

    public String getHobby() {
        return hobby;
    }

    public void setHobby(String hobby) {
        this.hobby = hobby;
    }

    public String getEmail() {
        return email;
    }

    public void setEmail(String email) {
        this.email = email;
    }

    @Override
    public String toString() {
        return "JoinVO{" +
                "id='" + id + '\'' +
                ", pw='" + pw + '\'' +
                ", age=" + age +
                ", email='" + email + '\'' +
                ", information='" + information + '\'' +
                ", hobby='" + hobby + '\'' +
                '}';
    }
}

4. controller - ValidController.java

package Controller;

import VO.JoinVO;
import org.springframework.stereotype.Controller;
import org.springframework.ui.Model;
import org.springframework.validation.BindingResult;
import org.springframework.validation.ObjectError;
import org.springframework.web.bind.annotation.ModelAttribute;
import org.springframework.web.bind.annotation.RequestMapping;
import org.springframework.web.bind.annotation.RequestMethod;

import javax.validation.Valid;
import java.util.List;

@Controller
public class ValidController {

    /**
     * joinForm 불러오기
     * @param joinVO
     * @param model
     * @return
     * @throws Exception
     */
    @RequestMapping(value = "/JoinForm", method = RequestMethod.GET)
    public String boardRegisterForm(@ModelAttribute("joinVO") JoinVO joinVO, Model model) throws Exception {
        return "JoinForm";
    }

    /**
     * joinForm 내용 검증
     * @param joinVO
     * @param bindingResult
     * @param model
     * @return
     * @throws Exception
     */
    @RequestMapping(value = "/joinInsert", method = RequestMethod.POST)
    public String boardInsert(@Valid JoinVO joinVO, BindingResult bindingResult, Model model) throws Exception {
        // Form 정보 출력
        System.out.println(joinVO.toString());
        // Validation 결과의 에러의 목록 출력
        if(bindingResult.hasErrors()) {
            List<ObjectError> errors = bindingResult.getAllErrors();
            for(ObjectError error : errors){
                System.out.println(error.getDefaultMessage());
            }
            return "JoinForm";
        }

        return "redirect:/JoinForm";
    }
}

5. JSP 페이지 - JoinForm.jsp

<%@ page contentType="text/html;charset=UTF-8" language="java" %>
<%--JSTL 문법 --%>
<%@ taglib uri="http://java.sun.com/jsp/jstl/core" prefix="c" %>
<%--form:form 태그 사용--%>
<%@ taglib prefix="form" uri="http://www.springframework.org/tags/form" %>
<html>
<head>
    <title>가입하세요</title>
</head>
<body>
<h1>회원가입</h1>
<form:form modelAttribute="joinVO" action="/joinInsert" method="post">
<%--    <form:errors path="*" cssClass="error"/>--%>
    <table border="1">
        <tbody>
        <tr>
            <th>이름</th>
            <td>
                <form:input path="id" id="id" size="20" maxlength="20"/>
                <form:errors path="id" cssClass="error"/>
            </td>
        </tr>
        <tr>
            <th>비밀번호</th>
            <td>
                <form:password path="pw" id="pw" size="20" maxlength="20"/>
                <form:errors path="pw" cssClass="error"/>
            </td>
        </tr>
        <tr>
            <th>나이</th>
            <td>
                <form:input path="age" id="age" size="20" maxlength="20"/>
                <form:errors path="age" cssClass="error"/>
            </td>
        </tr>
        <tr>
            <th>이메일</th>
            <td>
                <form:input path="email" id="email" size="20" maxlength="20"/>
                <form:errors path="email" cssClass="error"/>
            </td>
        </tr>
        <tr>
            <th>내용</th>
            <td>
                <form:textarea path="information" id="content"/>
                <form:errors path="information" cssClass="error"/>
            </td>
        </tr>
        <tr>
            <td>취미</td>
            <td><form:select path="hobby">
                <form:option value="soccer" label="축구" />
                <form:option value="basketball" label="농구" />
                <form:option value="tennis" label="테니스" />
            </form:select></td>
        </tr>
        <tr>
            <td colspan="2"><input type="submit" value="등록"/></td>
        </tr>
        </tbody>
    </table>
</form:form>
</body>
</html>

6.결과화면 

   - 등록을 눌렀을 때, 타당하지 않은 이유를 표시함

블로그 이미지

미나미나미

,


1. 메인의 SchoolMember.name을 바꾸기

/**
 * Hello world!
 *
 */
public class App {
    public static void main( String[] args ){
        System.out.println("SchoolMember().MebmberName() = > " + new SchoolMember().MebmberName());
    }
}
public class SchoolMember {

    public String MebmberName() {
        return "abc";
    }
}

- 결과화면

2. 새로운 프로젝에 net.bytebuddy를 불러오기

# https://mvnrepository.com/artifact/net.bytebuddy/byte-buddy

    - 런타임시 java Class들을 동적으로 만들어낼 수 있는 라이브러리


Maven Repository: net.bytebuddy » byte-buddy

Byte Buddy is a Java library for creating Java classes at run time. This artifact is a build of Byte Buddy with all ASM dependencies repackaged into its own name space. VersionRepositoryUsagesDate1.10.x1.10.8Central385Feb, 20201.10.7Central25Jan, 20201.10.

mvnrepository.com


2. pom.xml 의존성 추가 (Junit은 필요없습니다.)

  <dependencies>
    <dependency>
      <groupId>junit</groupId>
      <artifactId>junit</artifactId>
      <version>4.11</version>
      <scope>test</scope>
    </dependency>
    <!-- https://mvnrepository.com/artifact/net.bytebuddy/byte-buddy -->
    <dependency>
      <groupId>net.bytebuddy</groupId>
      <artifactId>byte-buddy</artifactId>
      <version>1.10.8</version>
    </dependency>
  </dependencies>

3.  변경할 함수와 이름 만들어 주기

public class SchoolNameChange {
    // premain
    public static void premain(String agentArgs, Instrumentation inst) {

        new AgentBuilder.Default()
                .type(ElementMatchers.any())
                .transform(new AgentBuilder.Transformer() {
                    @Override
                    public DynamicType.Builder<?> transform(DynamicType.Builder<?> builder, TypeDescription typeDescription, ClassLoader classLoader, JavaModule module) {
                        return builder.method(named("memberName")).intercept(FixedValue.value("Test"));
                    }
                }).installOn(inst);
    }
}

4. pom.xml 의 빌드에 Maven jar 생성 부분 추가

<build>
        <plugins>
            <plugin>
                <groupId>org.apache.maven.plugins</groupId>
                <artifactId>maven-jar-plugin</artifactId>
                <version>3.2.0</version>
                <configuration>
                    <archive>
                        <index>true</index>
                        <manifest>
                            <addClasspath>true</addClasspath>
                        </manifest>
                        <manifestEntries>
                            <mode>development</mode>
                            <url>${project.url}</url>
                            <key>value</key>
                           <!-- Manifest attribute -->
                          <!-- 애플리케이션 시작시 옵션으로 주기, Package 넣어주기-->
                          <Premain-Class>org.example.SchoolNameChange</Premain-Class>
                          <!-- 클래스 변경 허용 부분 -->
                          <Can-Redefine-Classes>true</Can-Redefine-Classes>
                          <Can-Retransform-Classes>true</Can-Retransform-Classes>
                          <!-- 클래스 변경 허용 부분 -->
                          <!-- Manifest attribute -->
                    </archive>
                </configuration>
            </plugin>
        </plugins>
    </build>

5. mvn clean package , jar 파일 생성

 - tistory... .jar 파일 생성

6. 기존의 프로젝트에 VM options에 jar 파일 추가

 [-javaagent:C:\Users\.....\target\tistoryBytebuddyJavaagent-1.0-SNAPSHOT.jar]


7. 실행

블로그 이미지

미나미나미

,