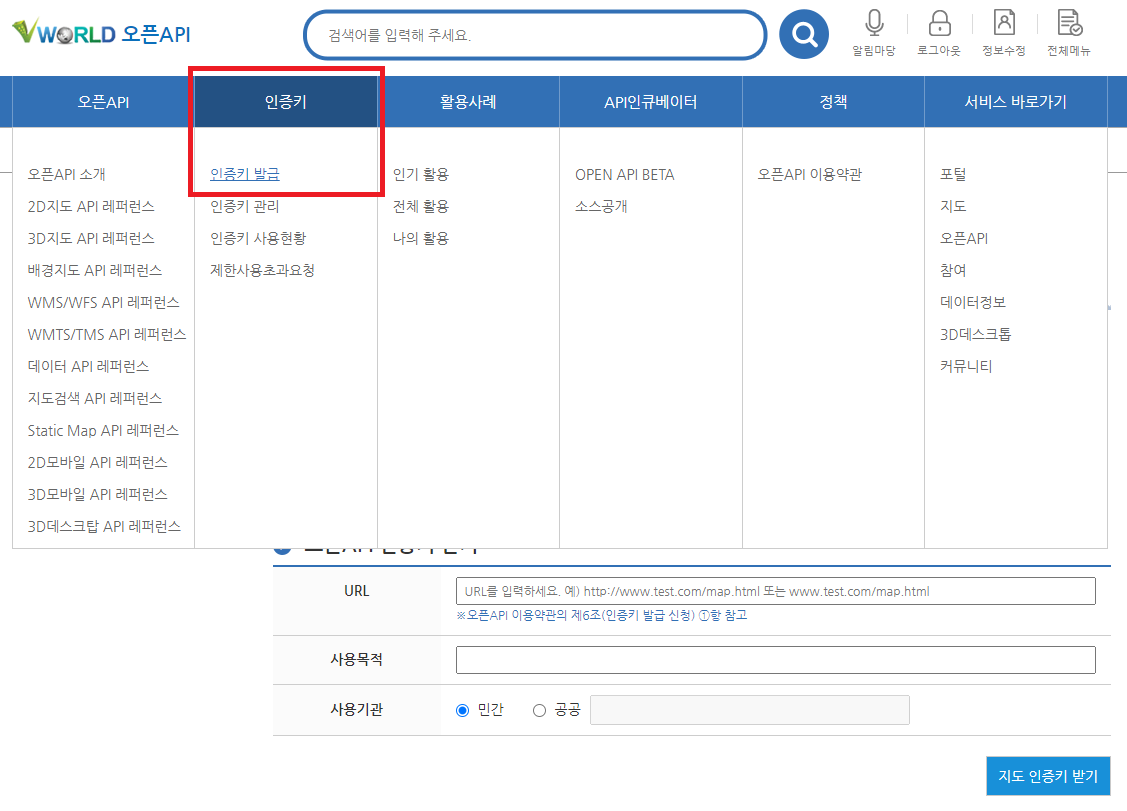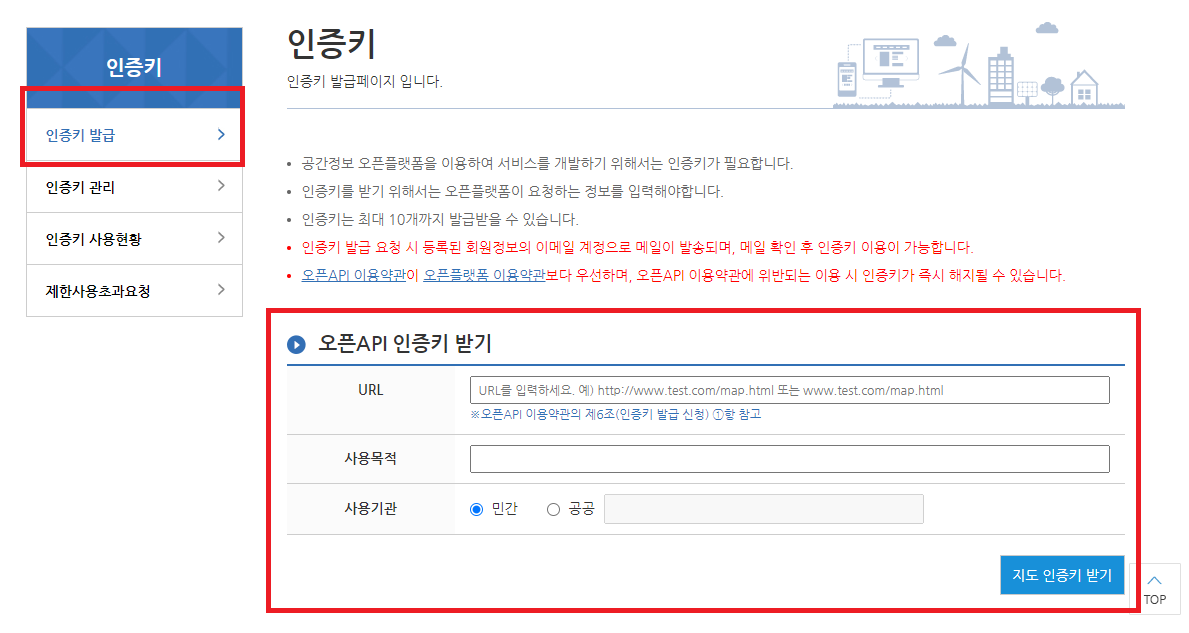
* 이미지 파일 DB에 넣는 과정입니다.
https://minaminaworld.tistory.com/212
[java]PostgreSQL DB (데이터베이스)에 file(이미지) 넣기
# Java와 PostgreSQL을 통한 파일을 집어 넣기 전 준비 사항 1. postgreSQL JDBC Jar 추가하기 (https://jdbc.postgresql.org/download.html) PostgreSQL JDBC Download Download About Binary JAR file downloads..
minaminaworld.tistory.com
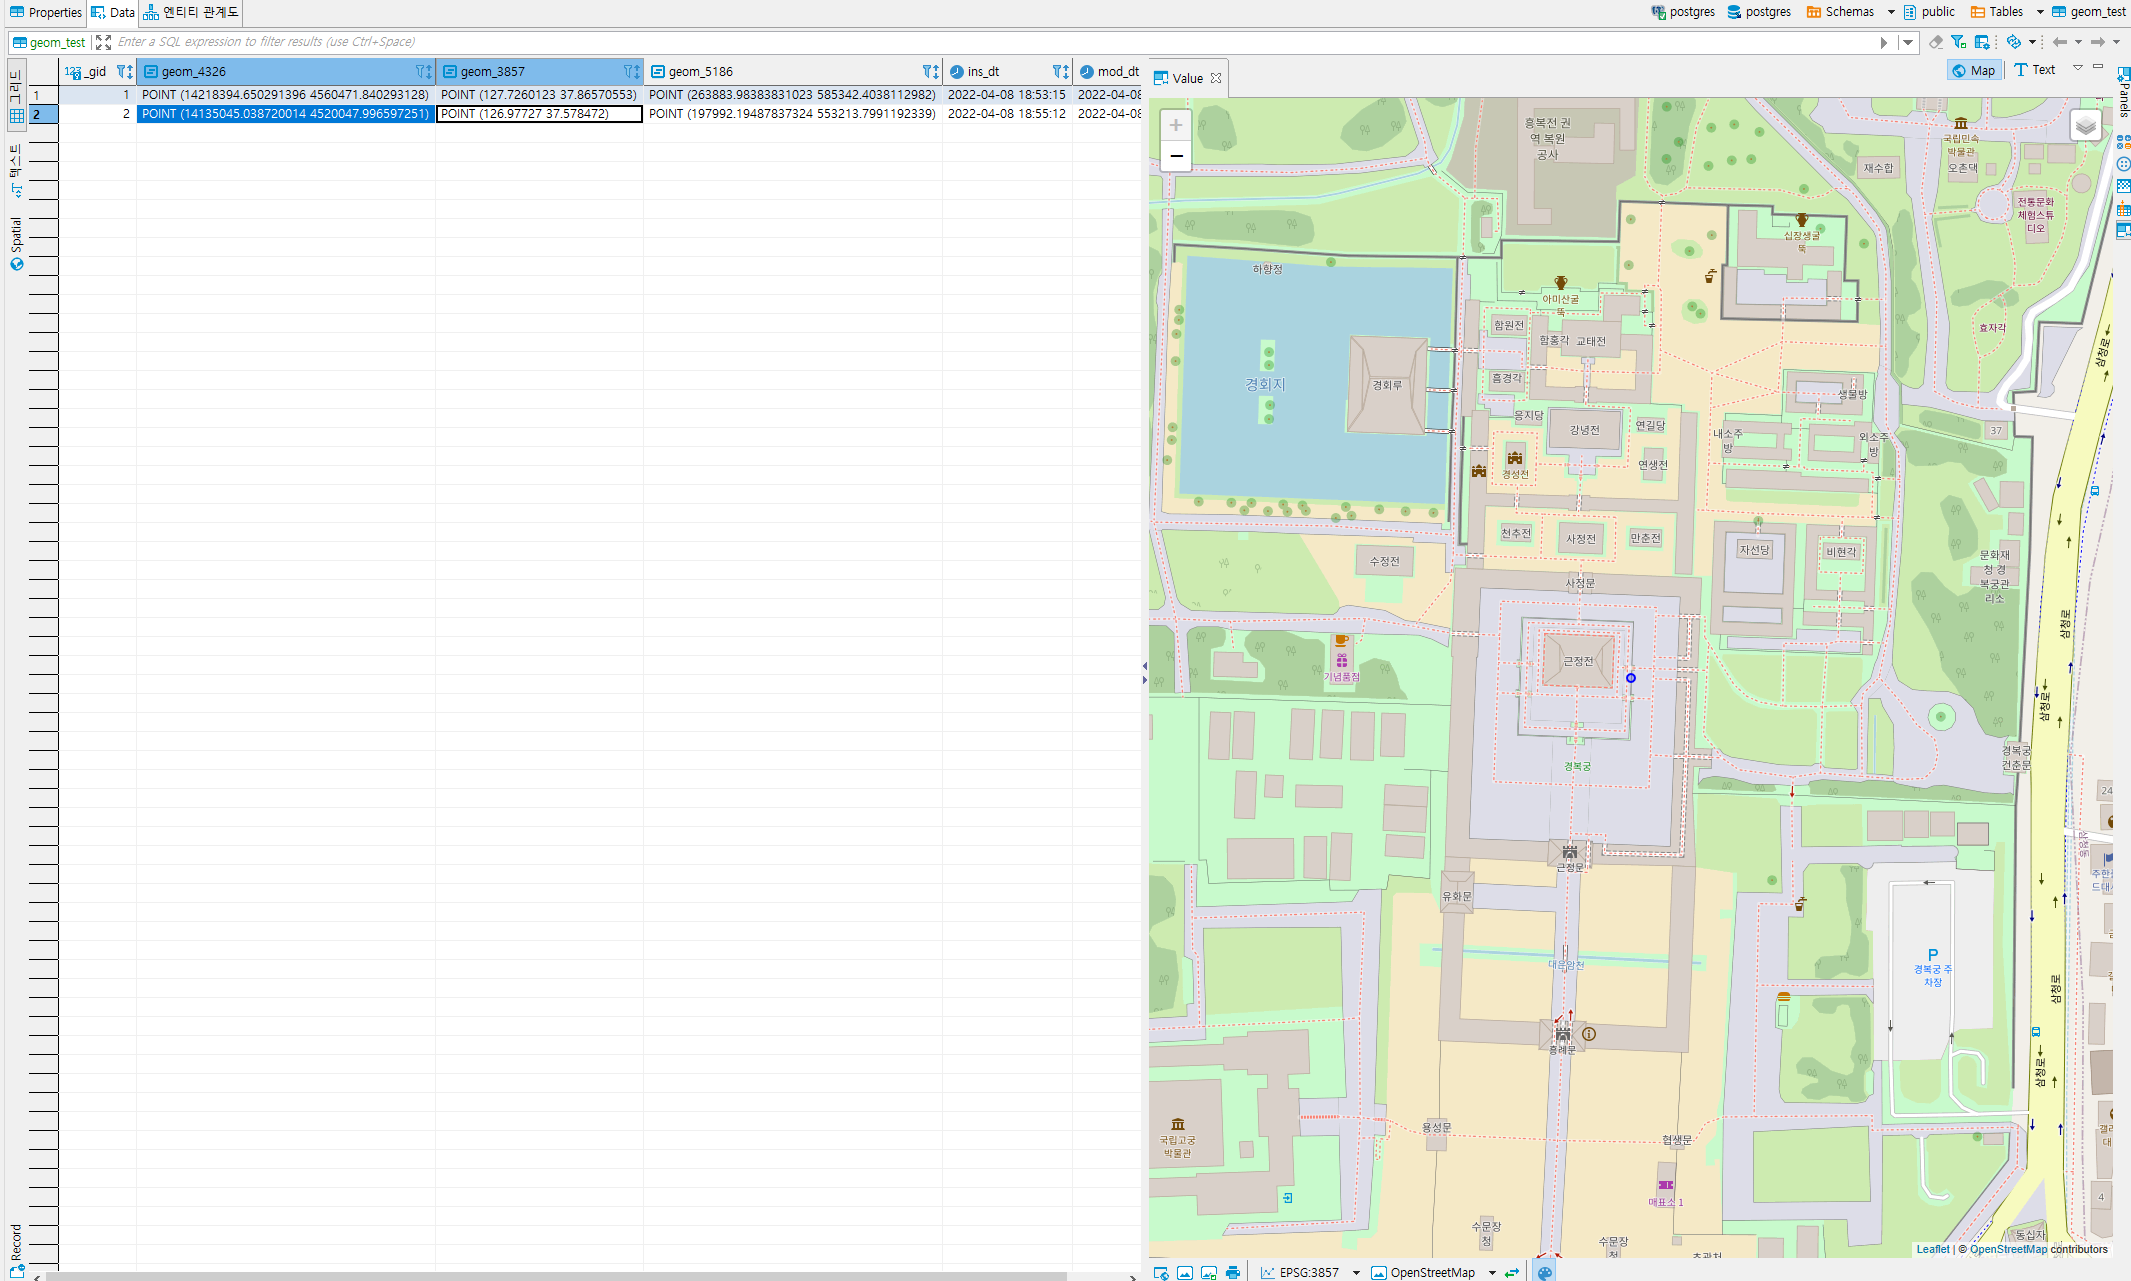
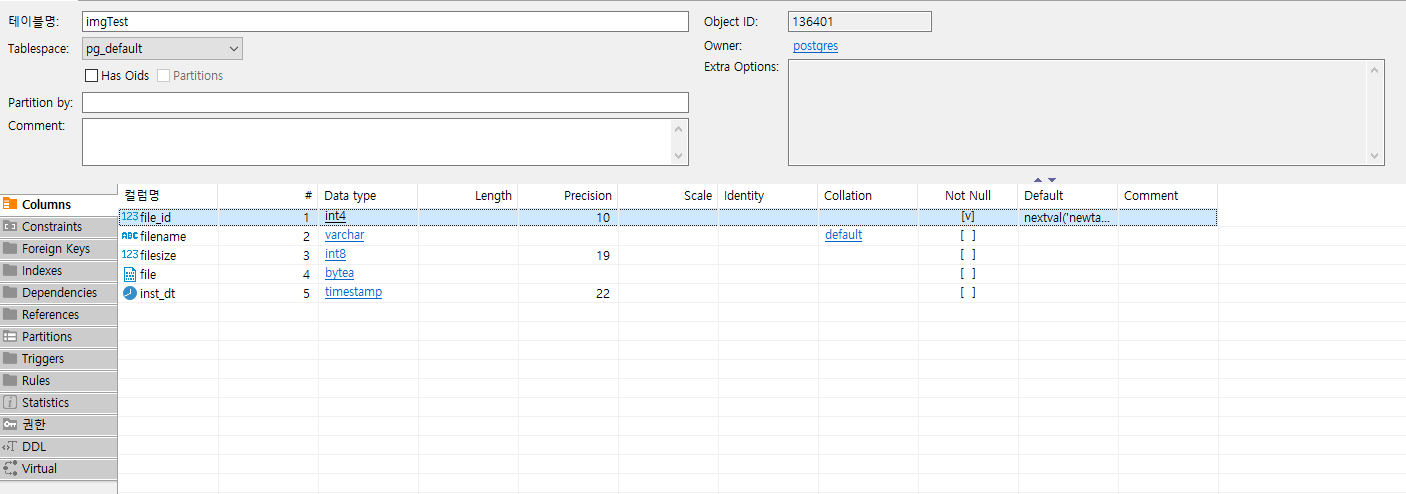
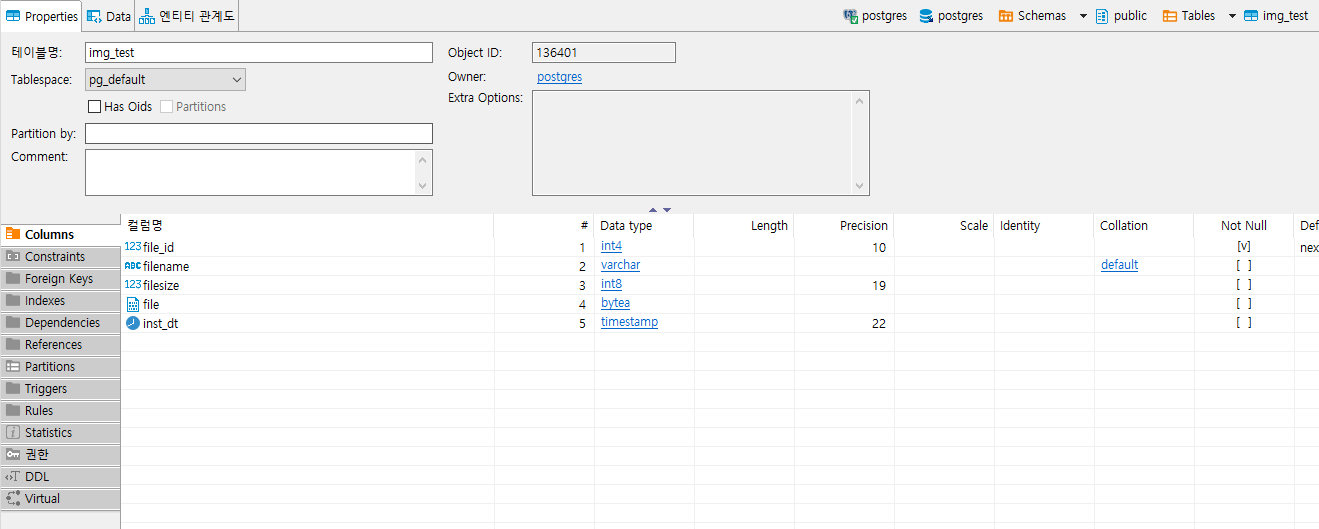
1. 테이블 구조
2. DB에서 데이터 읽어오는 부분과 이미지 정보 DTO 구성
* DB 에서 이미지 정보 읽어 오기
public void readImg() {
        String sql = "SELECT file_id, filename, filesize, file, inst_dt from public.img_test";
        Connection connection = null;
        PreparedStatement pstmt = null;

        try {
            connection = DriverManager.getConnection(connurl, user, password);
            pstmt = connection.prepareStatement(sql);
            ResultSet resultSet = pstmt.executeQuery();

            ImgDto imgDto = new ImgDto();
            while (resultSet.next()) {
                imgDto.setFileId(resultSet.getInt("file_id"));
                imgDto.setFilename(resultSet.getString("filename"));
                imgDto.setFilesize(resultSet.getLong("filesize"));
                imgDto.setFile(resultSet.getBytes("file"));
                imgDto.setInsDt(resultSet.getTimestamp("inst_dt").toLocalDateTime());
            }
            System.out.println("imgDto.toString() = " + imgDto.toString());
            // 이미지 정보를 파일로 저장하는 함수 호출
            saveImg(imgDto);
        } catch (SQLException e) {
            e.printStackTrace();
        } finally {
            try {
                pstmt.close();
            } catch (SQLException e) {
                e.printStackTrace();
            }
            try {
                connection.close();
            } catch (SQLException e) {
                e.printStackTrace();
            }
        }
    }
* DB에서 가져온 데이터 DTO로 변환
import java.time.LocalDateTime;

public class ImgDto {
    private int fileId;
    private String filename;
    private Long filesize;
    private byte[] file;
    private LocalDateTime insDt;

    public ImgDto() {
    }

    public int getFileId() {
        return fileId;
    }

    public void setFileId(int fileId) {
        this.fileId = fileId;
    }

    public String getFilename() {
        return filename;
    }

    public void setFilename(String filename) {
        this.filename = filename;
    }

    public Long getFilesize() {
        return filesize;
    }

    public void setFilesize(Long filesize) {
        this.filesize = filesize;
    }

    public byte[] getFile() {
        return file;
    }

    public void setFile(byte[] file) {
        this.file = file;
    }

    public LocalDateTime getInsDt() {
        return insDt;
    }

    public void setInsDt(LocalDateTime insDt) {
        this.insDt = insDt;
    }

    @Override
    public String toString() {
        return "ImgDto{" +
                "fileId=" + fileId +
                ", filename='" + filename + '\'' +
                ", filesize=" + filesize +
                ", insDt=" + insDt +
                '}';
    }
}
3. Img 파일로 저장
private void saveImg(ImgDto imgDto) {
// 저장할 위치
String strPath = "D:/testFolder/aaa";
Path path1 = Paths.get(strPath + "/" + imgDto.getFilename());
try {
Files.write(path1, imgDto.getFile());
} catch (IOException e) {
e.printStackTrace();
}
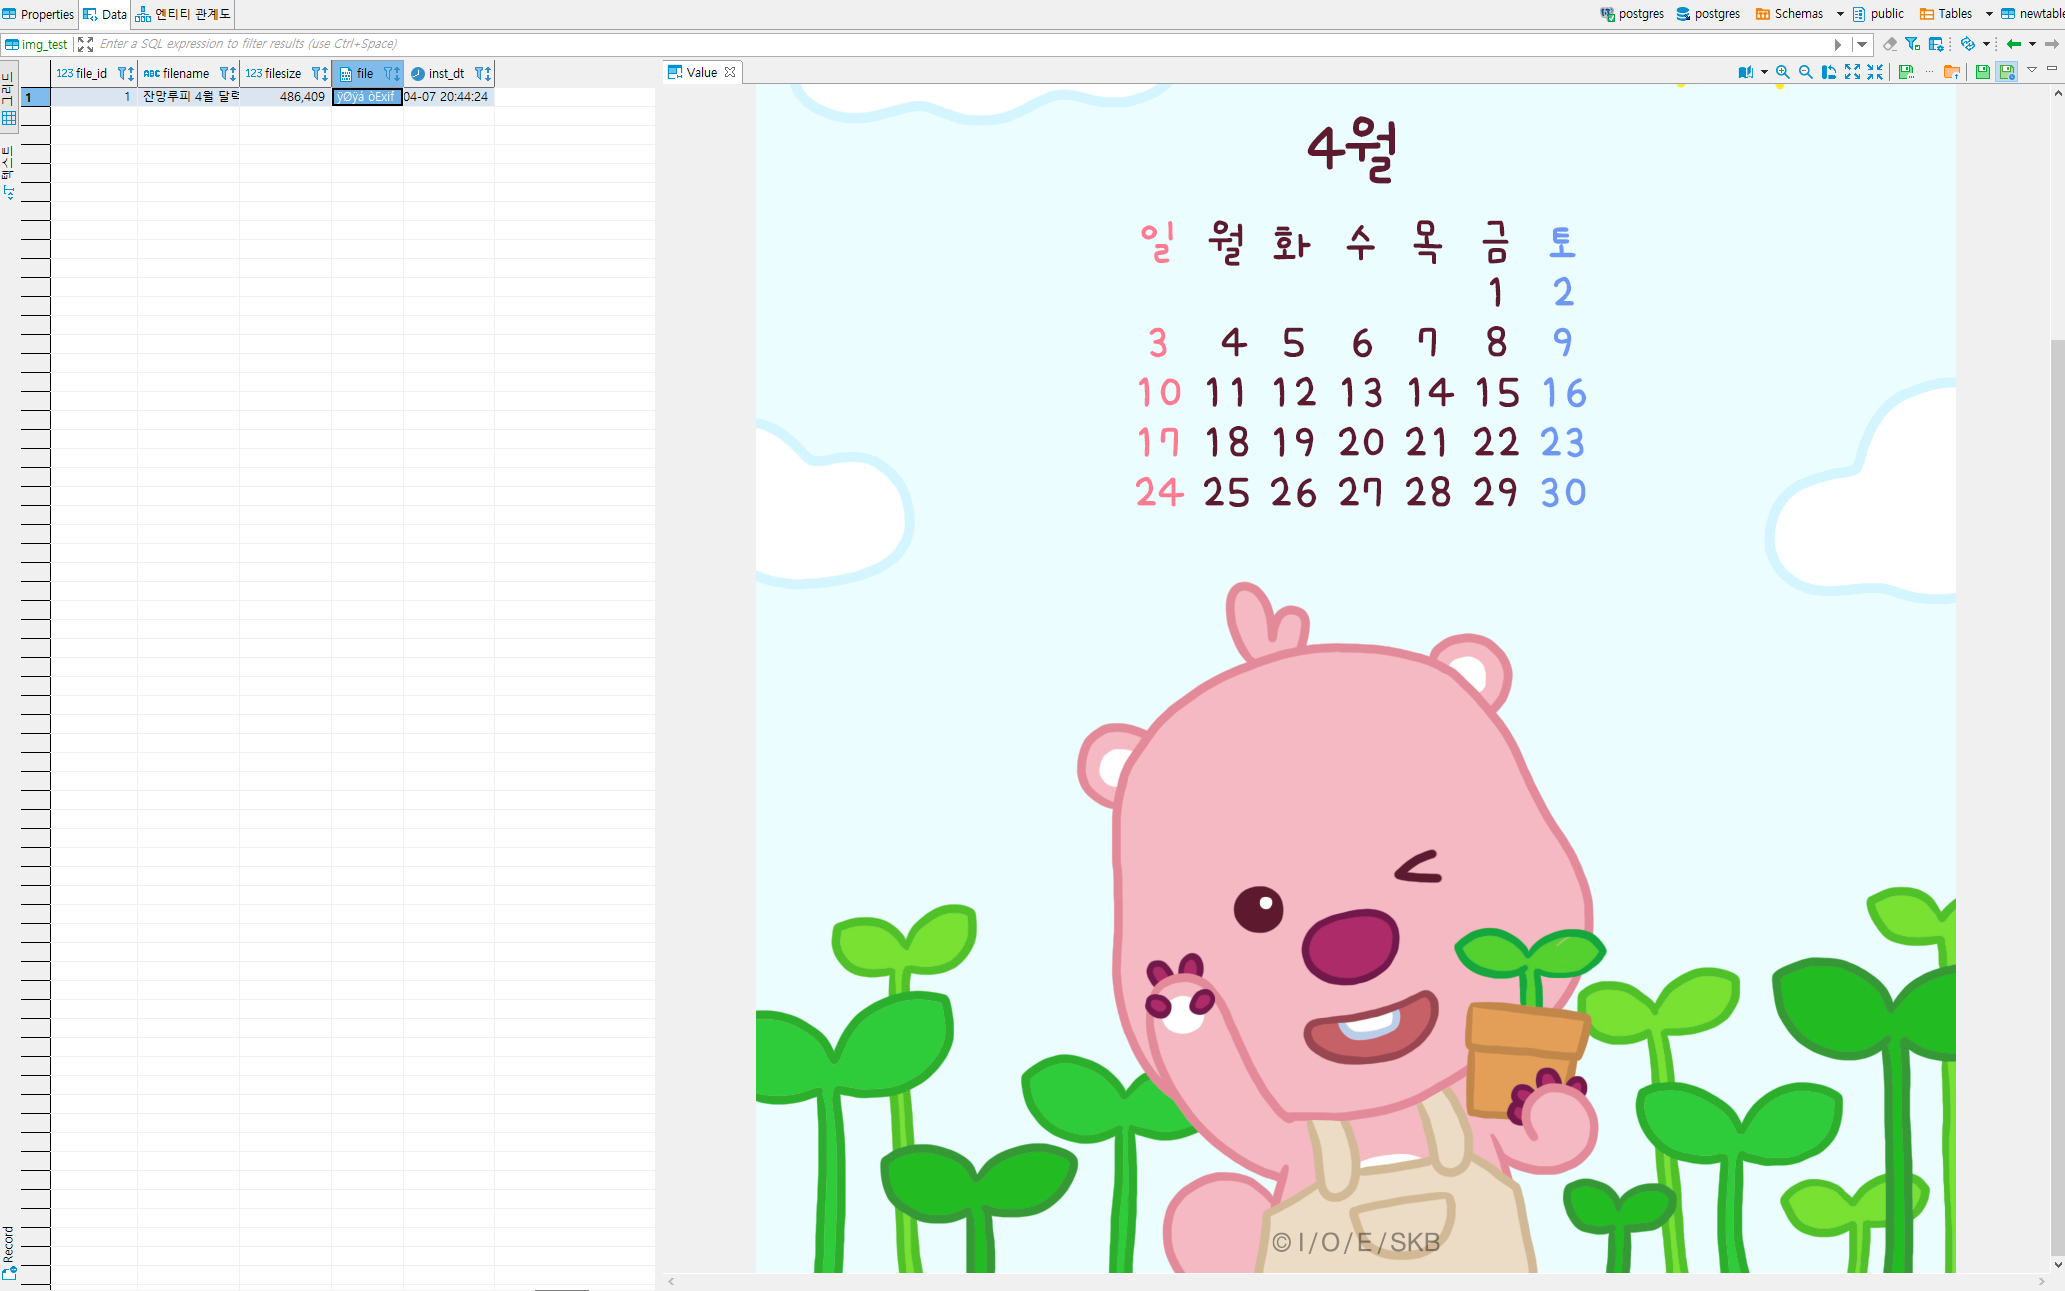
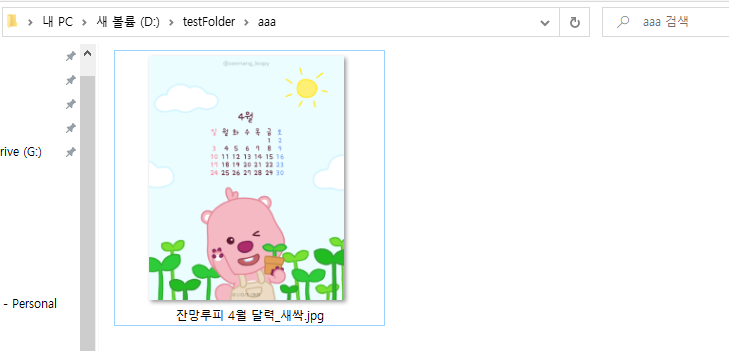
}4. 결과화면
* Console 로그

* 저장된 파일
더보기
public void readImg() {
    String sql = "SELECT file_id, filename, filesize, file, inst_dt from public.img_test";
    Connection connection = null;
    PreparedStatement pstmt = null;

    try {
        connection = DriverManager.getConnection(connurl, user, password);
        pstmt = connection.prepareStatement(sql);
        ResultSet resultSet = pstmt.executeQuery();

        ImgDto imgDto = new ImgDto();
        while (resultSet.next()) {
            imgDto.setFileId(resultSet.getInt("file_id"));
            imgDto.setFilename(resultSet.getString("filename"));
            imgDto.setFilesize(resultSet.getLong("filesize"));
            imgDto.setFile(resultSet.getBytes("file"));
            imgDto.setInsDt(resultSet.getTimestamp("inst_dt").toLocalDateTime());
        }
        System.out.println("imgDto.toString() = " + imgDto.toString());
        saveImg(imgDto);
    } catch (SQLException e) {
        e.printStackTrace();
    } finally {
        try {
            pstmt.close();
        } catch (SQLException e) {
            e.printStackTrace();
        }
        try {
            connection.close();
        } catch (SQLException e) {
            e.printStackTrace();
        }
    }
}

private void saveImg(ImgDto imgDto) {
    String strPath = "D:/testFolder/aaa";
    Path path1 = Paths.get(strPath + "/" + imgDto.getFilename());
    try {
        Files.write(path1, imgDto.getFile());
    } catch (IOException e) {
        e.printStackTrace();
    }
}'[java]' 카테고리의 다른 글
| [PostgreSQL] DB(데이터베이스)에 Geom 생성하기 (0) | 2022.04.08 |
|---|---|
| [java]PostgreSQL DB (데이터베이스)에 file(이미지) 넣기 (0) | 2022.04.07 |
| Java 좌표를 통한 주소 구하기(Open API Geocoder API 사용하기) (0) | 2020.09.06 |
| [JAVA] String []를 ArrayList변환 (0) | 2020.08.06 |
| [JAVA] ArrayList를 String[] 변환 여러가지 방법 (0) | 2020.08.05 |

미나미나미