

[react-beautiful-dnd] react, next.js 드래그 만들기 2
[react-beautiful-dnd] react, next.js 드래그 만들기 2
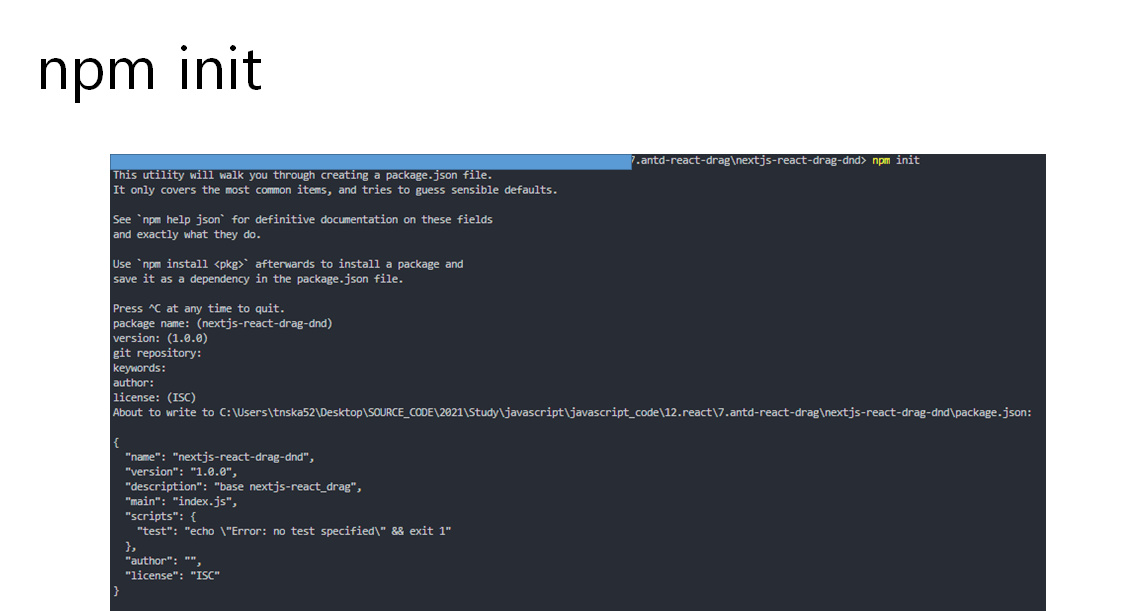
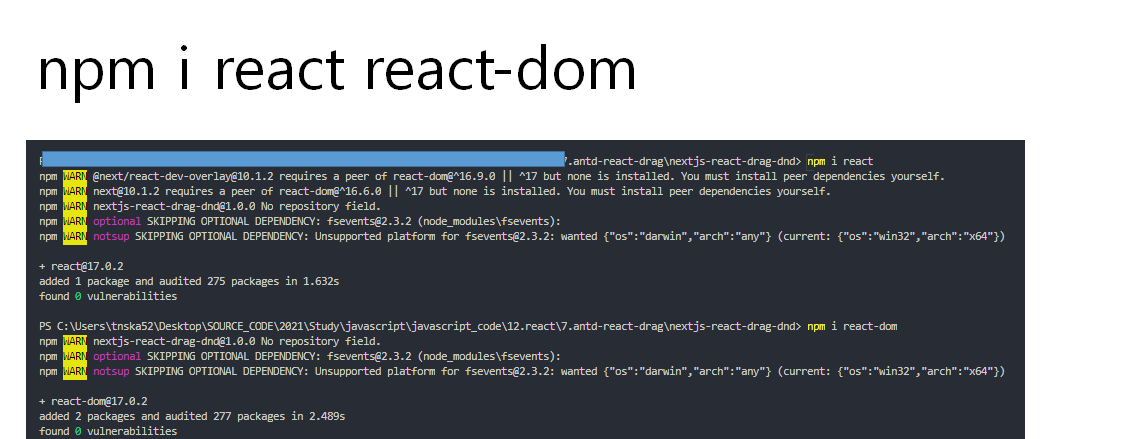
[react-beautiful-dnd] react, next.js 드래그 만들기 1 [react-beautiful-dnd] react, next.js 드래그 만들기 1 # react-beutiful-dnd 요소를 통한 Drag 만들기 github.com/atlassian/react-beautiful-dnd atlass..
minaminaworld.tistory.com
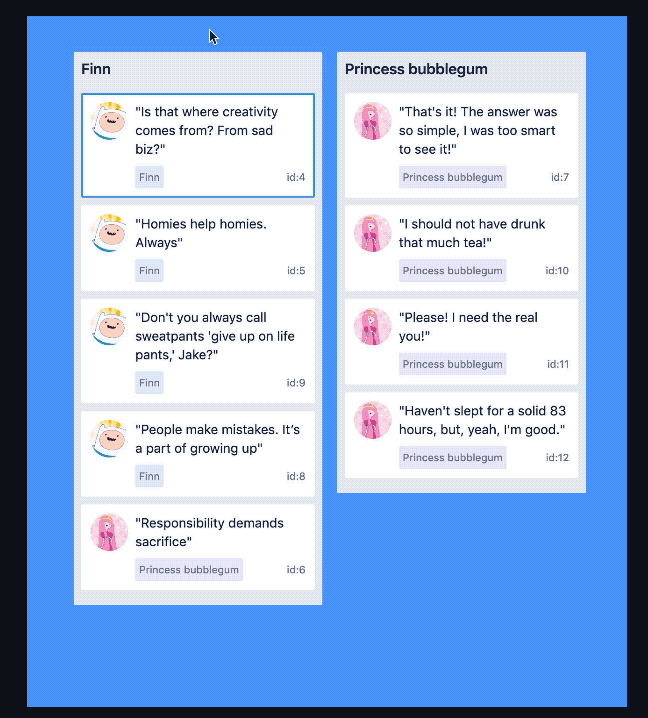
# 결과화면

1. index.js
- DragLand Component 불러오기
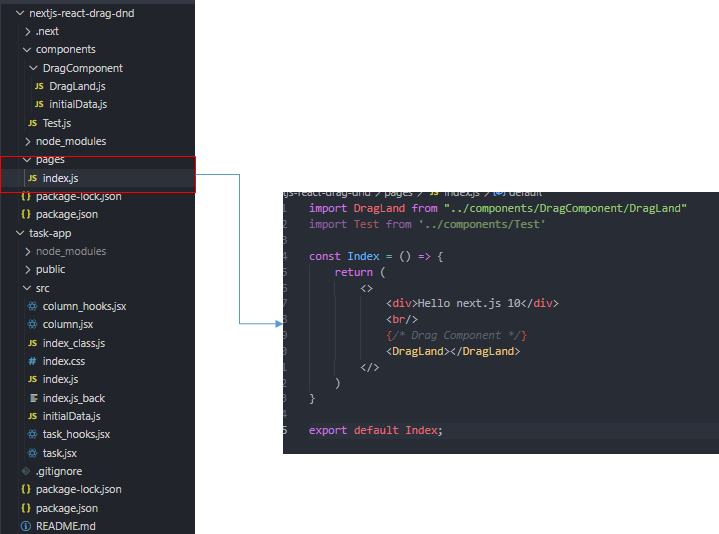
import DragLand from "../components/DragComponent/DragLand"
// import Test from '../components/Test'

const Index = () => {
    return (
        <>
            <div>Hello next.js 10</div>
            <br/>
            {/* Drag Component */}
            <DragLand></DragLand>
        </>
    )
}

export default Index;
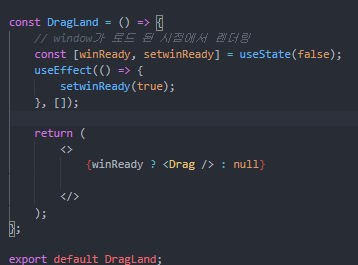
2. DragLand.js
-DragLand.js Component가 Load된 시점 Drag Components 불러오기

// React 관련 요소
import React, { useCallback, useEffect, useState, PureComponent } from 'react';
import Drag from './Drag';

const DragLand = () => {
    // window가 로드 된 시점에서 렌더링
    const [winReady, setwinReady] = useState(false);
    useEffect(() => {
        setwinReady(true);
    }, []);

    return (
        <>
            {/* 윈도우, DOM 로드 시점에서 드래그 생성 */}
            {winReady ? <Drag /> : null}
        </>
    );
};

export default DragLand;
3. Drag.js
-Drag 요소 만들기
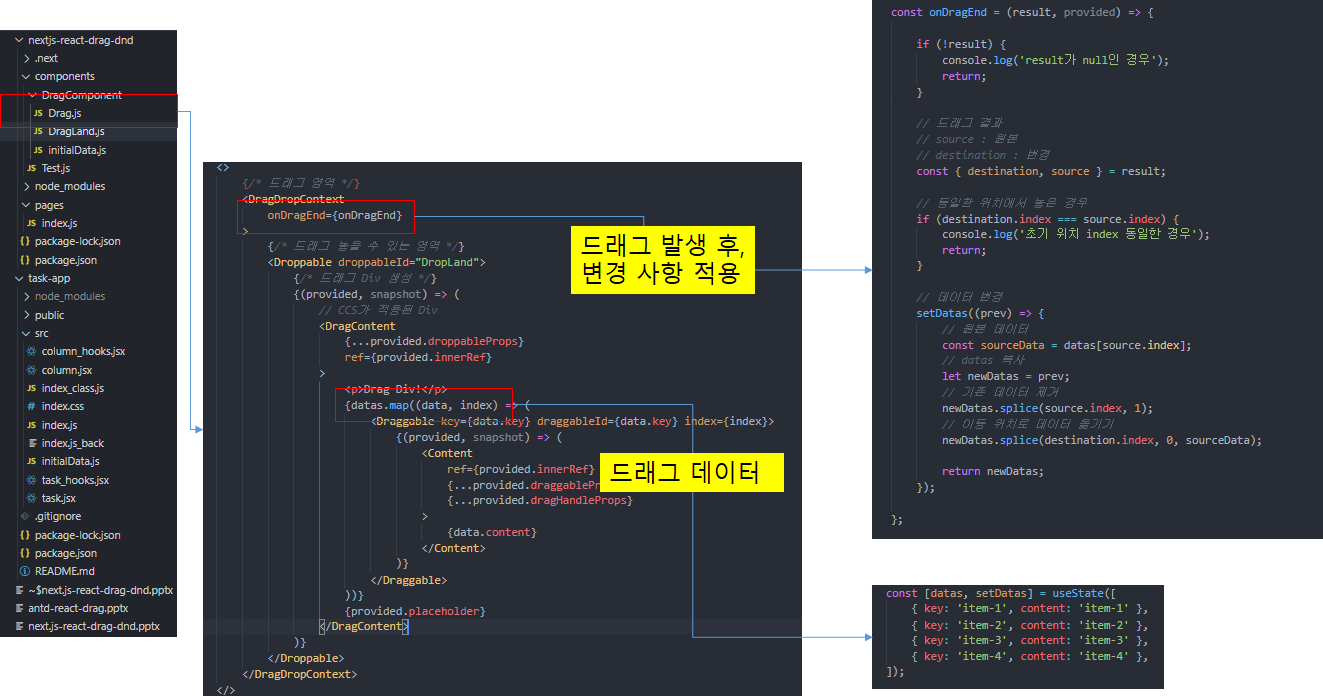
// React 관련 요소
import React, { useCallback, useEffect, useState, PureComponent } from 'react';
// 드래그 요소
import { DragDropContext, Draggable, Droppable } from 'react-beautiful-dnd';
// 스타일 정의
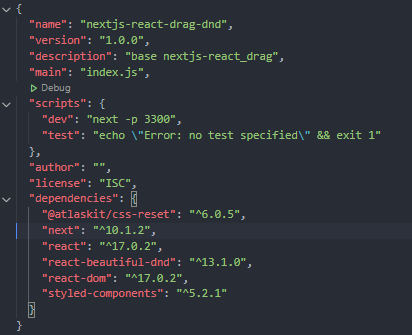
import styled from 'styled-components';
import '@atlaskit/css-reset';
const DragContent = styled.div`
border: 1px solid lightgrey;
`;
const Content = styled.div`
margin: 8px;
padding : 10px;
border: 1px solid lightgrey;
border-radius: 2px;
`;
// 드래그 요소 생성
const Drag = () => {
const [datas, setDatas] = useState([
{ key: 'item-1', content: 'item-1' },
{ key: 'item-2', content: 'item-2' },
{ key: 'item-3', content: 'item-3' },
{ key: 'item-4', content: 'item-4' },
]);
const onDragEnd = (result, provided) => {
if (!result) {
console.log('result가 null인 경우');
return;
}
// 드래그 결과
// source : 원본
// destination : 변경
const { destination, source } = result;
// 동일한 위치에서 놓은 경우
if (destination.index === source.index) {
console.log('초기 위치 index 동일한 경우');
return;
}
// 데이터 변경
setDatas((prev) => {
// 원본 데이터
const sourceData = datas[source.index];
// datas 복사
let newDatas = prev;
// 기존 데이터 제거
newDatas.splice(source.index, 1);
// 이동 위치로 데이터 옮기기
newDatas.splice(destination.index, 0, sourceData);
return newDatas;
});
};
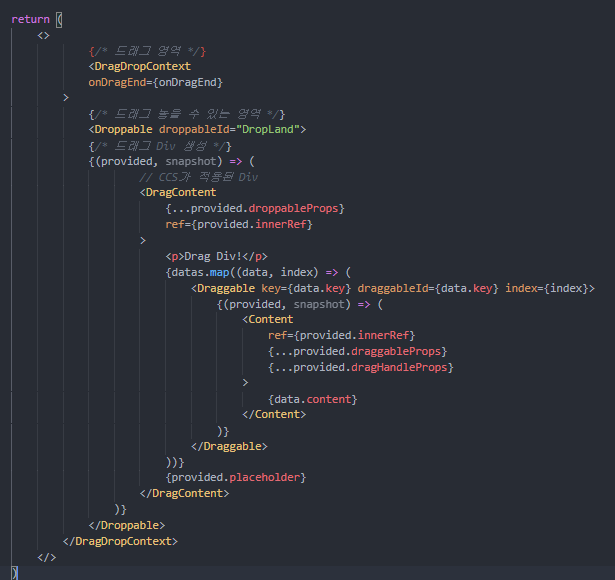
return (
<>
{/* 드래그 영역 */}
<DragDropContext
onDragEnd={onDragEnd}
>
{/* 드래그 놓을 수 있는 영역 */}
<Droppable droppableId="DropLand">
{/* 드래그 Div 생성 */}
{(provided, snapshot) => (
// CCS가 적용된 Div
<DragContent
{...provided.droppableProps}
ref={provided.innerRef}
>
<p>Drag Div!</p>
{datas.map((data, index) => (
<Draggable key={data.key} draggableId={data.key} index={index}>
{(provided, snapshot) => (
<Content
ref={provided.innerRef}
{...provided.draggableProps}
{...provided.dragHandleProps}
>
{data.content}
</Content>
)}
</Draggable>
))}
{provided.placeholder}
</DragContent>
)}
</Droppable>
</DragDropContext>
</>
)
}
export default Drag;
'[react] > react-beautiful-dnd' 카테고리의 다른 글
| [react-beautiful-dnd] react, next.js 드래그 만들기 2 (0) | 2021.03.31 |
|---|---|
| [react-beautiful-dnd] react, next.js 드래그 만들기 1 (0) | 2021.03.31 |
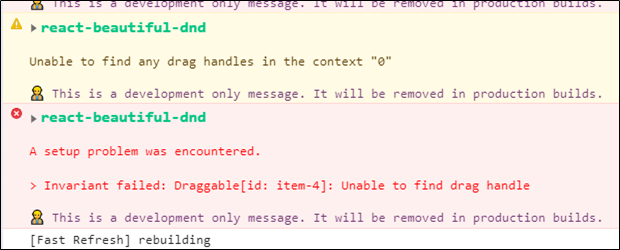
| [react-beautiful-dnd] Invariant failed: Draggable[id: item-1]: Unable to find drag handle (0) | 2021.03.31 |

미나미나미